Why Your Grill Marks Are Uneven and How to Fix Them
Uneven grill marks almost always come down to a handful of fixable mistakes. If you want the real answer to what causes uneven grill marks, it’s usually a mix of moisture sitting on the meat, a grate that hasn’t fully preheated, and poor contact between the food and the metal. You flip the steak expecting deep, even sear lines, and instead you get pale smudges with a few dark spots.
The good news is that all of these are fixable once you know what to look for.
Most home cooks don’t realize that a grill mark is essentially a heat-transfer problem. The grate has to be hot enough to brown the surface instantly, and the meat has to actually touch the grate. Add a domed steak that curves upward, and you get classic zebra stripes.
In our research, manufacturer specifications consistently point to a target grate temperature of 500°F to 600°F for proper searing as of 2026. Get that right and most other issues fade away.

Quick Answer
What causes uneven grill marks? The usual culprits are wet meat, cold grates, poor contact, and uneven heat. Moisture creates steam that blocks browning.
Thin grates lose heat fast. A domed steak pulls away from the bars. Fix those four things and your marks even out.
What You're Actually Looking At: Reading the Marks Like a Pro

A grill mark is not just a cosmetic detail. It's a direct message from the surface of your food about what happened during those first few minutes of cooking. When you learn to read the pattern, you can diagnose almost every issue without cutting into the meat.
Here's what different marks actually mean.
- Pale, ghost-like stripes. The meat was lifted off the grate, either by steam or by a dome shape. The surface didn't stay in contact long enough to brown.
- Dark edges with a raw-looking center. This points to the doming effect. The edges touched the metal, but the middle hovered above it.
- Blotchy, random dark patches. That's a heat-zone problem. One area of the grate is much hotter than another.
- Black, carbonized lines with no gradient. The grate was too hot in spots or had burnt-on residue acting as a second surface.
Think of the marks as a contact tracing test for your grilling technique. If the impression is faint, the contact was faint. If the pattern is uneven, the heat was uneven.
The steak doesn't lie.
The Physics of a Perfect Sear (And Why It's Not Happening)
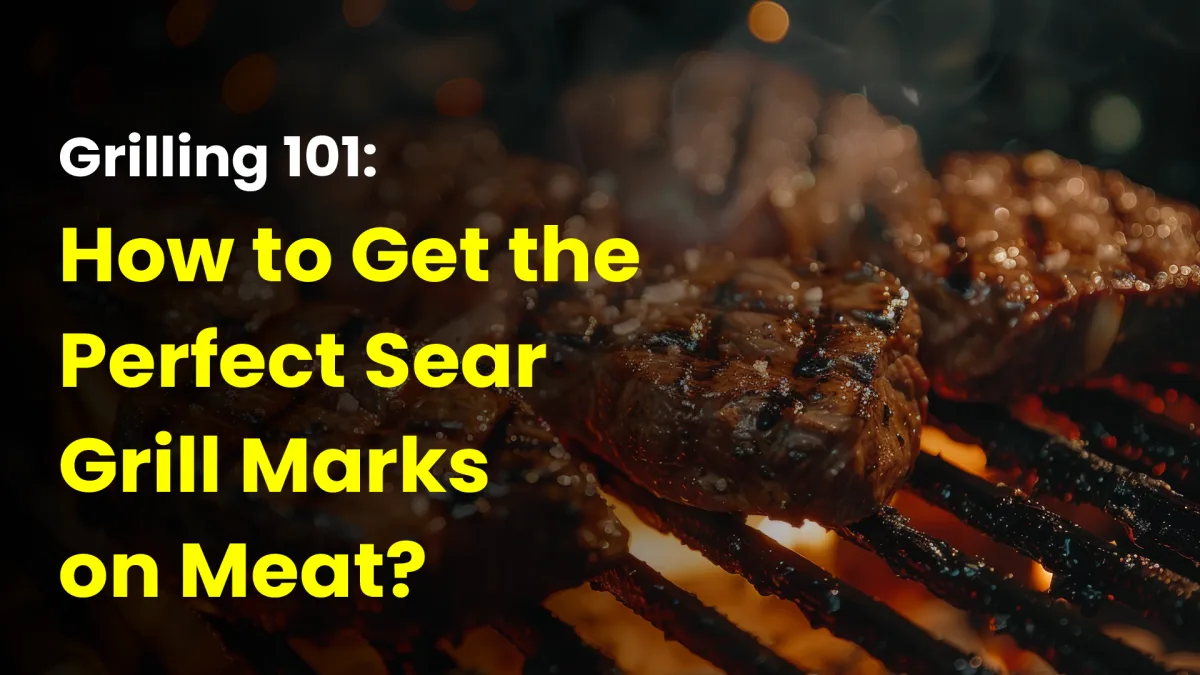
At its core, a grill mark is a small patch of the Maillard reaction. That's the chemical process where amino acids and sugars on the surface of the meat react under high heat and turn brown. But that reaction only happens when the surface is dry and the temperature is high enough.
If either condition fails, you don't get a sear. You get steamed meat.
The heat from the grate moves into the food by conduction. That means direct contact. The better the contact, the faster and more even the browning.
But many home grills struggle with conduction because the grates are thin or unevenly heated. A thick cast iron grate acts as a heat battery. It stores energy and releases it into the meat the second it touches.
A thin chrome wire grate doesn't do that. It dumps its heat quickly and then has to recover.
There's also radiant heat coming from the coals or burners below. This adds color between the grate lines, but it can't do the job alone. You need that forceful contact sear for the deep, dark lines.
When the grate is cold, the meat's surface temperature barely reaches 300°F, which is far below the 350°F to 500°F range where the Maillard reaction moves fast.
So if your sear looks weak, think about two things. Did the meat actually touch the grate? And was that grate hot enough to trigger browning on contact?
Most of the time the answer is no to one of those questions.
Why Your Grill Grates Are Sabotaging the Pattern

Not all grates are created equal. The material your grate is made from changes how well it holds heat, how quickly it recovers, and how evenly it sears. If you're using the factory grates on a budget gas grill, that might be your whole problem.
Those thin chrome-plated wire grates look fine when new, but they lose heat shockingly fast.
Here's a quick comparison of common grate materials.
| Grate Material | Heat Retention | Effect on Marks |
|---|---|---|
| Cast iron | Very high | Deep, even sear lines |
| Stainless steel | Moderate | Decent lines but can be spotty |
| Chrome-plated wire | Low | Pale, uneven, patchy marks |
| Porcelain-coated | Moderate to high | Good but chips over time |
Beyond the material, the condition of the grate matters just as much. A dirty grate covered in carbonized fat does not conduct heat the same way clean metal does. That burnt residue actually insulates the food from the hot surface.
It also creates an uneven surface, so only some parts of the meat touch the metal. You end up with dark flecks where food touched the clean spots and pale streaks everywhere else.
Clean those grates while they're hot. Use a good wire brush or wooden scraper before every cook. You don't need them spotless, but you need smooth, bare metal where the food will sit.
Then oil the grate lightly with a high-smoke-point oil like avocado or canola. A thin layer of oil improves contact and helps prevent sticking. It also fills any microscopic gaps in the metal so the sear is more uniform.
Finally, check your burner or coal layout. If the grate sits unevenly, it will heat unevenly. Make sure the grates are seated properly and not warped.
A warped grate will never give you even marks no matter how hot you get it.
The #1 Killer: Moisture and the Steam Barrier
If there's one single mistake that ruins more grill marks than any other, it's moisture. A wet steak cannot sear. The water on the surface has to boil off before any browning can happen.
That process steals heat from the grate and creates steam, which lifts the meat off the metal. It's a double whammy.
Think about what happens when you throw a damp paper towel onto a hot pan. It slides around on a cushion of steam. Your steak does exactly the same thing.
It's called the steam barrier effect, and it's the enemy of every grill cook.
Wet surfaces come from several places. Maybe you marinated the meat and didn't dry it off. Maybe you rinsed it under the tap.
Maybe you stored it in a package with excess liquid and then went straight to the grill. Even a light sheen of moisture is enough to ruin the first minute of searing.
The fix is simple and free. Pat the meat dry with paper towels before seasoning. Get the surface as dry as you reasonably can.
If you marinated, let the meat sit uncovered in the fridge for 30 minutes so the surface dries out. Then season right before grilling. Salt draws moisture to the surface, so salting too early can backfire.
There's also the moisture inside the meat to consider. A steak taken straight from the fridge is cold and often a little damp. Let it sit at room temperature for 20 to 30 minutes before cooking.
This helps the surface dry and lets the interior warm slightly, which encourages more even cooking. Just don't leave raw meat out for hours.
For food safety, the USDA recommends that whole cuts of beef reach at least 145°F inside. But before you ever worry about the interior, get that exterior dry. Dry meat browns.
Wet meat steams. No amount of grill heat changes that basic rule.
Heat Zones and the Uneven Glow: Mapping Your Grill
Every grill has hot spots and cold spots. That's not a flaw in your specific grill. It's a function of how burners and charcoal beds work.
The center usually runs hotter than the edges. Corners can be significantly cooler. If you don't map these zones before cooking, your marks will always come out uneven.
The easiest way to map your grill is the bread test. Take a few slices of cheap white bread and lay them across the entire grate surface. Close the lid and wait two minutes.
Lift the lid and look at the toast pattern. Dark brown sections are hot spots. Light or untouched sections are cool zones.
That's your map.
Once you know where the heat lives, you have options. If you're cooking a single steak, place it directly over the hottest, most even part of the grate. If you're cooking multiple pieces, rotate them halfway through so each one gets some time on the hot spots.
For thicker cuts, you can use a two-zone setup. Sear over the hot side first, then move to the cooler side to finish without burning.
Gas grills with multiple burners make this easier because you can turn one side high and one side low. Charcoal cooks can bank the coals to one side for the same effect. The key is to stop assuming every inch of the grate is the same temperature.
Also pay attention to your lid. Opening the lid constantly bleeds heat from the grate surface. Every time you peek, you lower the temperature and slow the sear.
Leave the lid closed during the first few minutes after you place the meat. Let the grate recover from the initial drop in temperature.
Wind is another zone killer. A steady breeze can rob a gas grill of heat and push the flame to one side. If you grill in a windy spot, set up a windbreak or position the grill so the wind hits the back, not the burner tubes.
That tiny adjustment can even out your heat dramatically.
Finally, check the fuel level if you're on propane. A tank that's nearly empty won't maintain full pressure. The flame looks fine, but it's weaker than you think.
That weakness translates directly to pale, patchy grill marks. Swap the tank or have a backup ready before you start cooking for a crowd.
The Contact Problem: Why the Steak Pulls Away From the Metal
Even marks need full contact. If the meat touches only part of the grate, only that part browns.
Steak is not flat. Muscle fibers tighten as heat hits them. The center lifts.
If the edges are dark and the middle is pale, the steak domed. Gravity and tension beat the grate.
The Doming Effect and How Gravity Works Against You
Doming happens most with thick steaks, lean cuts, and meat that went straight from the fridge. Cold fibers contract harder.
You can see it before you flip. The edges sizzle while the center looks quiet.
For thin cuts, the problem is smaller. For flank, skirt, or strip steaks, it can wipe out the middle marks.
Pressing Without Losing Juices: The 30-Second Rule
Pressing helps if you do it early and gently. Use a spatula and apply even pressure for about 30 seconds.
Do not smash the steak. You are not trying to squeeze out juice. You are only closing the gap between meat and metal.
If the meat sticks, stop. Let the sear release on its own. Forced movement tears the crust and leaves patchy marks.
Timing the Flip: Reading the Color Before You Move
Flip when the meat releases easily. If you have to yank it, the sear is not ready.
The first side usually needs 3 to 4 minutes on a properly preheated grill. The second side often takes less.
Look for brown edges and a slight lift at the corners. Those are signs the Maillard reaction has set.
When to Rotate for Diamond Marks (And When Not To)
Rotate only after the first set of marks has set, usually after 90 seconds to 2 minutes. Then turn the steak about 45 degrees.
If the grill is running weak or the meat is sticking, skip the rotate. One clean set of marks beats two smeared ones.
For crosshatch marks, you need high heat, dry meat, and patience. If any one is missing, keep it simple.
A Visual Guide to Diagnosing Bad Marks
Your eyes are the best diagnostic tool. The pattern tells you what failed.
Pale Tiger Stripes vs. Dark Blotches vs. Black Edges
Use this quick guide.
| Mark pattern | Likely cause | Fast fix |
|---|---|---|
| Pale stripes | Steam barrier or poor contact | Pat dry and press early |
| Dark blotches | Hot spots or carbon buildup | Rotate food and clean grates |
| Black edges | Flare-ups or sugary marinade | Trim fat and move to cooler zone |
| One-sided sear | Uneven grate heat | Map zones and cook over hotter area |
If the marks look like faint tiger stripes, moisture is the usual suspect. If the marks are dark but random, the grate surface is uneven.
Black edges often mean fat dripped and flared. That is not a sear mark. It is soot and char.
Step-by-Step: The Perfect Mark Routine
Prep the Meat
Pat the surface dry with paper towels. Let the meat rest at room temperature for 20 to 30 minutes.
Rub a thin layer of high-smoke-point oil on the meat, not the grate. Season just before cooking.
Preheat and Clean
Preheat the grill with the lid closed for 10 to 15 minutes. Manufacturer specs often target 500°F to 600°F at the grate for searing.
Scrape the grates while hot. Wipe or brush off old carbon, then oil the bars lightly.
Place, Press, and Rotate
Place the steak across the bars at a slight angle. Press gently for 30 seconds.
Leave it alone until the first marks set. Rotate only if you want crosshatch marks.
Flip and Finish
Flip with tongs when the meat releases. If the second side is browning too fast, move it to a cooler zone.
Finish over indirect heat if the steak needs more time inside. Rest it for 5 to 10 minutes before slicing.
Common Mistakes That Guarantee a Patchy Sear
These mistakes cause most patchy sears.
- Putting cold, wet meat on the grill.
- Preheating for only a few minutes.
- Opening the lid every 30 seconds.
- Crowding the grate and dropping the temperature.
- Using sugary sauces too early.
- Flipping before the crust releases.
- Ignoring warped or thin grates.
- Grilling with a low propane tank.
If you fix only three things, dry the meat, preheat longer, and press for contact. Those three changes solve most uneven mark problems.
Charcoal vs. Gas: Why the Fuel Changes the Marks
Charcoal and gas grills deliver different heat patterns. Charcoal often burns hotter at the grate. That can help a fast sear.
But it also makes hot spots worse.
Charcoal grates sit closer to the coals. That intense direct heat can sear quickly. But the airflow is uneven.
Gas grills offer more control. You can fine-tune burner levels. But the grates on budget gas models often run cooler.
If you want even marks on a gas grill, pick a model with thick stainless or cast iron grates. And preheat longer to make up for lower output.
Flat-Top vs. Open Grate: Should You Even Bother With Marks?
Flat-tops skip the bars entirely. That means no grill marks at all. But some cooks still want the look of marks on a griddle.
The trade-off is simple. Restaurants use broilers and planchas for even browning. Grill marks are mostly for texture and presentation.
If marks come out uneven on a flat-top, it is usually because of cold spots or steam. Same rules apply.
Maintaining Grates for Long-Term Consistency
Cleaning After the Cook vs. Before the Cook
Cleaning before you cook matters more than cleaning after. Fresh residue insulates and bunches the pattern.
After every cook, scrape off the big chunks. But before each cook, do a hot scrape and oil pass. That object evaporation.
Seasoning Cast Iron Grates Like a Skillet
Cast iron grates benefit from light seasoning. Rub a thin coat of oil on warm grates after cleaning. Let it polymerize.
Never use soap on cast iron. That strips the seasoning and can cause rust.
Real-World Scenarios: Fixing the Marks Based on What You See
If your marks look uneven, run this checklist.
- Edges dark, middle pale? Press the steak flat.
- Stripes faint, meat gray? Dry the surface and raise the heat.
- Different sides different shades? Rotate the meat and map your zones.
- Black edges and flare-ups? Trim fat and reduce sauce sugar.
Each pattern has a root cause.
FAQs About Uneven Grill Marks
Frequently Asked Questions
Why are my grill marks pale?
Pale marks almost always mean steam or weak contact. Dry the meat and preheat the grill longer.
Why are my grill marks dark on the edges?
The steak domed. Press it gently for the first 30 seconds of cooking.
Do I need special grates for even marks?
Thick cast iron or stainless grates help. But dry meat and good preheat matter more.
How long should I preheat a grill for even marks?
At least 10 to 15 minutes with the lid closed. The grates need to hold heat before the meat goes on.
Can I get even marks on a gas grill?
Yes. Use thick grates and preheat longer. And dry the meat well.
Final Verdict: What Your Grill Marks Are Trying to Tell You
Uneven grill marks are rarely random. They follow a pattern you can fix. Dry the meat, preheat the grate, press for contact, and map your heat zones.
Do that and the sear turns even. Skip any one and you'll chase blotchy stripes all season. The marks don't lie.
Read them and adjust.

Similar Posts



















