Stop Dry Meat on Gas Grills: 7 Fixes
Picture this: you've got a gorgeous ribeye or a pack of chicken breasts, the grill is preheated, and you're ready to make something great. Then you pull it off, slice into it, and it's dry, tough, and disappointing. If you've been wondering how to prevent dry meat on a gas grill, you're not alone.
It's the single most common frustration I hear from home grillers, and the good news is that it's completely fixable.
The root cause isn't usually the meat or the grill itself. It's a method problem. Gas grills dry food out faster than charcoal or pellet grills because they cook with dry radiant heat and offer less smoke flavor to mask texture issues.
Add in a few common mistakes like cooking too hot, skipping a rest period, or trusting the built-in lid thermometer, and you've got a recipe for jerky. As of 2026, aggregate reviews from home grillers and manufacturer specifications all point to the same fix: temperature control beats timing, every single time. Let's break down exactly how to nail it.
Quick Answer
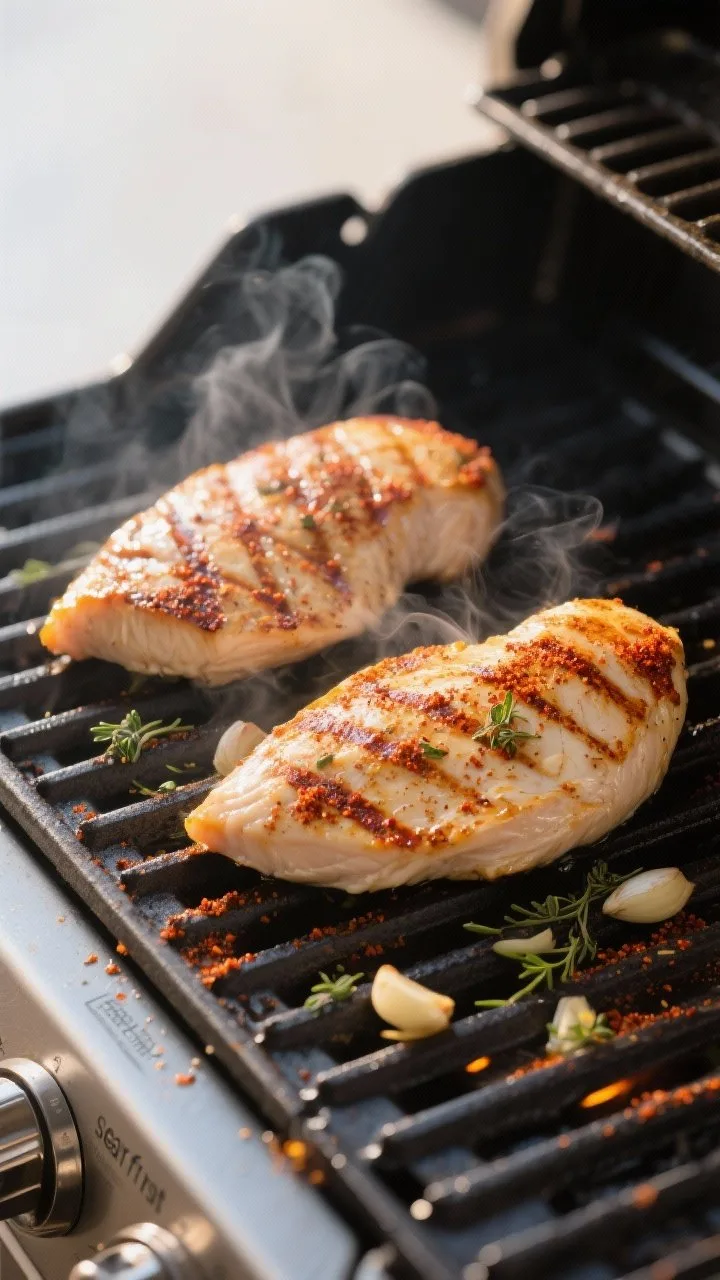
Prevent dry meat on a gas grill by using two-zone heat. Sear over high heat, then move to the cooler side. Use a meat thermometer and pull the meat 5 to 10°F early.
Rest it for 5 to 10 minutes before slicing. That's the whole game.
The Real Problem: Why Your Gas Grill Is Drying Out Meat
Gas grills have one massive advantage: precision. You turn a dial and get a consistent flame, which is great for temperature control. But that same dry, radiant heat is exactly what pulls moisture out of meat if you're not careful.
Unlike a charcoal grill that radiates heat from glowing coals, gas burners heat the air directly, and a steady stream of hot air over meat equals evaporation. Fast.
The other issue is that gas grills don't produce the same smoky, complex flavor that masks dryness. A slightly overcooked piece of chicken on a charcoal grill might still taste decent because of the smoke. The same chicken on a gas grill has nowhere to hide.
You taste every dry, stringy bite.
So the real problem isn't your grill. It's how you're using it. Most home grillers treat their gas grill like a one-heat-zone machine.
They light all burners, crank it to high, throw the meat on, and hope for the best. That's a direct ticket to dry meat. When the whole grate is ripping hot, you've got no escape route for thicker cuts.
The outside burns before the inside cooks, or you flip constantly and end up with a leathery exterior and an undercooked center.
The Difference Between "Well-Done" and "Dried Out"
This is worth clearing up. Well-done just means the internal temperature reached a higher point. Dried out means the moisture inside has cooked off or been squeezed out.
You can have a well-done steak that's still juicy if you cook it low and slow and rest it properly. Conversely, you can have a medium-rare chicken breast that's somehow dry (which happens when you cut it too early or cook it too fast). The internal temp matters, but so does how you get there.
How Lean Cuts, Thick Cuts, and Bone-In Cuts Behave Differently
Not all meat responds the same way to heat. This is where the if/then logic kicks in.
Lean cuts like chicken breast, pork chops, and fish have almost no fat to render or baste the meat. That means they dry out fast. They need quick cooking over medium heat or a sear-then-slide method, and they need to come off the grill at the exact right temperature.
No exceptions.
Marbled cuts like ribeye, NY strip, and burgers have fat throughout. That fat melts and bastes the meat from the inside as it cooks. They're more forgiving, but they still need proper heat management to avoid charring the outside while the inside stays raw.
Thick cuts like brisket, pork shoulder, and tri-tip need low, indirect heat for extended periods. They have connective tissue that needs time to break down. Crank the heat too high and you'll get a burnt exterior with a tough, dry interior.
Bone-in cuts actually help protect against dryness. The bone acts as an insulator, slowing heat transfer to the meat closest to it. Plus, the extra surface area means more fat and connective tissue, which keeps things moist.
That's why bone-in chicken thighs beat boneless, skinless breasts on the grill almost every time.
Before You Grill: Prep Steps That Lock in Moisture
You can do everything right at the grill and still end up with dry meat if you skipped prep. The steps you take before the meat hits the grates have a huge impact on final moisture. Here's what actually matters, and what's just kitchen folklore.
Patting Dry vs. Wet Meat: What Actually Matters
Here's a common misconception: wet meat cooks moister. That's backwards. Excess surface moisture on meat turns to steam when it hits the grill.
That steam creates a barrier between the meat and the grill grates, which means you get poor browning and a steamed, not seared, exterior. Worse, the meat spends more time on the heat trying to build that crust, which raises the internal temperature and dries it out.
Pat your meat dry with paper towels before seasoning. A dry surface sears faster, which means less time on the grill. Less time on the grill means less moisture loss.
This is one of those tiny steps that pays off in a big way.
Dry Brining with Salt: How It Works and When to Do It
Dry brining is the most underrated trick in grilling. You salt the meat generously and let it sit in the fridge for 1 to 24 hours. The salt draws out moisture initially, but then the meat reabsorbs it, seasoning it all the way through.
The salt also denatures some of the proteins, which helps the meat retain more moisture during cooking.
For thick cuts like steak and pork chops, dry brine for at least 1 hour, ideally overnight. For chicken, a 2-hour dry brine works wonders. Don't worry about over-salting.
Use about 1 teaspoon of kosher salt per pound of meat. As a benchmark, USDA research confirms that salt-assisted moisture retention is a real, measurable phenomenon in cooked meat.
Marinades and Wet Brines: Which Cuts Benefit Most
Wet brines are great for lean meats. Submerge chicken breasts or pork chops in a saltwater solution for 30 minutes to 2 hours, and they'll hold onto moisture more effectively. The salt changes the protein structure, allowing it to trap more water during cooking.
Marinades are a different tool. They add flavor on the surface but don't penetrate much beyond the first few millimeters, unless they contain acid or salt. Acid counterintuitively saves the meat if you marinate for less than 2 hours, but anything over 6 hours with acid starts to break down the proteins too far, turning the exterior mushy and impacting texture.
Use:
- Wet brine: For lean, thin cuts like chicken breast and pork chops
- Acidic marinade: For 30 min to 2 hours max, mostly for flavor
- Dry brine: For steaks, roasts, and anything thicker than 1 inch
Bringing Meat to Room Temperature: Fact or Myth
Let's settle this. Letting meat sit on the counter for 30 minutes doesn't actually bring it to room temperature. A thin steak might rise 5 to 8 degrees, but a thick chop won't move much.
The real benefit is more subtle: it takes the chill off the surface, which helps the exterior sear faster and more evenly.
Here's what's actually true. Cold meat hitting a hot grill can cool the grates and cause sticking. A 15-minute rest on the counter helps the surface come up a few degrees, which improves the sear and reduces cooking time.
It's not transformative, but it's not a waste of time either. Skip it if you're in a rush, but don't skip the pat-dry step.
Know Your Grill: Heat Zones and Burner Setup
The biggest mistake new gas grillers make is treating the entire cooking surface as one uniform temperature. It's not. Gas grills have hot spots, cold spots, and zones that behave differently depending on which burners are on.
Understanding your grill's heating pattern is essential to preventing dry meat.
How to Set Up Two-Zone Grilling on a Gas Grill
Two-zone grilling means you create a hot zone and a cool zone on the same grate. This gives you a place to sear and a place to finish cooking without charring.
The setup is straightforward:
- Turn one side of the grill burners to high
- Leave the other side burners off
- Close the lid and preheat for 10 to 15 minutes
- The lit side becomes your sear zone, 450 to 550°F
- The unlit side becomes your cool zone, 250 to 350°F
For thicker cuts, start on the hot side to build a crust, then move to the cool side and close the lid to finish. For thinner cuts like chicken breasts, start on the cool side to cook most of the way through, then finish with a quick sear on the hot side.
Direct vs. Indirect Heat: Which Cuts Need Which
Direct heat means the meat sits directly over the flame. Indirect heat means you move the meat away from the burner entirely, using the closed lid to create an oven-like environment.
- Direct heat: For thin cuts (under 1 inch), like burgers, hot dogs, thin pork chops, and chicken thighs
- Indirect heat: For thick cuts (over 1 inch), like steaks, chicken breast, whole chicken, and ribs
The rule of thumb is simple: if the cut takes more than 15 minutes to cook, it belongs on the indirect side. Direct heat can't cook the inside without burning the outside.
Where the Hot Spots Are on Typical Gas Grills
Every gas grill has hot spots, and they're usually predictable. The areas directly above the burners run hottest. The edges and corners run cooler.
The back of the grill is often cooler than the front due to airflow. The center of the grill is typically the hottest point, especially if you have a center burner or a "sear zone" feature.
To find your grill's specific spots, do a simple test. Lay a slice of white bread across the grate and close the lid for 2 minutes. The bread will toast faster where the heat is highest.
This gives you a visual map of your hot and cool zones. It takes one minute and saves you from ruining a whole batch of meat.
Why the Lid Up vs. Lid Down Decision Changes Everything
Here's a common beginner habit: flipping burgers with the lid up, or cooking chicken with the lid up to "watch it." That's a mistake. An open lid lets heat escape, drops the cooking temperature, and increases cooking time. More time on the grill means more moisture loss.
Keep the lid down as much as possible. This traps heat and creates a convection effect, circulating hot air around the meat and cooking it more evenly. The only times to lift the lid are to flip, check temperature, or remove the meat.
Each time you lift, you lose 20 to 30 degrees of heat and extend your cook time. It's a chain reaction that leads directly to dry meat.
Step-by-Step: The Two-Zone Method for Juicy Results
Now we get to the action steps. This is the exact workflow that prevents dry meat on a gas grill. Follow these steps in order, and you'll get juicy, evenly cooked results every time.
Preheating Properly (and Why 15 Minutes Matters)
Preheating isn't optional. A cold grill causes meat to stick, cook unevenly, and take longer to reach temp. Turn all burners on high, close the lid, and heat for 15 minutes.
Manufacturer specifications for most gas grills, including Weber and Napoleon models, call for this exact preheat time.
After 15 minutes, adjust your burners to create your two zones. Leave one burner on high and turn the others to medium or off, depending on your setup. Let the grill settle for 5 minutes before placing meat.
Setting Up Your Sear Zone and Your Safe Zone
Your sear zone is the area directly over the high burner. This is where you'll build a crust. Your safe zone is the area over the off or low burners.
This is where meat finishes cooking gently.
For a standard 3-burner grill, turn the left burner to high and the other two off. For a 4-burner grill, turn the left two to high and the right two off. For a smaller 2-burner grill, turn the left to high and the right to medium-low.
The exact configuration matters less than having a clear hot side and cool side.
The Sear-Then-Move Technique: When to Flip, When to Slide
Here's the method that works for nearly everything:
- Place the meat over the sear zone
- Sear for 2 to 3 minutes without moving it
- Flip and sear the other side for 2 to 3 minutes
- Move the meat to the cool zone
- Close the lid and cook until the internal temperature reaches your target minus 5 to 10°F
This technique works because the sear locks in surface flavor. It doesn't actually "lock in juices" (that's a myth), but it does create a tasty crust. The real benefit is that the meat spends minimal time at extreme temperatures, which prevents moisture from boiling off the surface.
Using a Probe Thermometer: Where to Insert It and What to Watch For
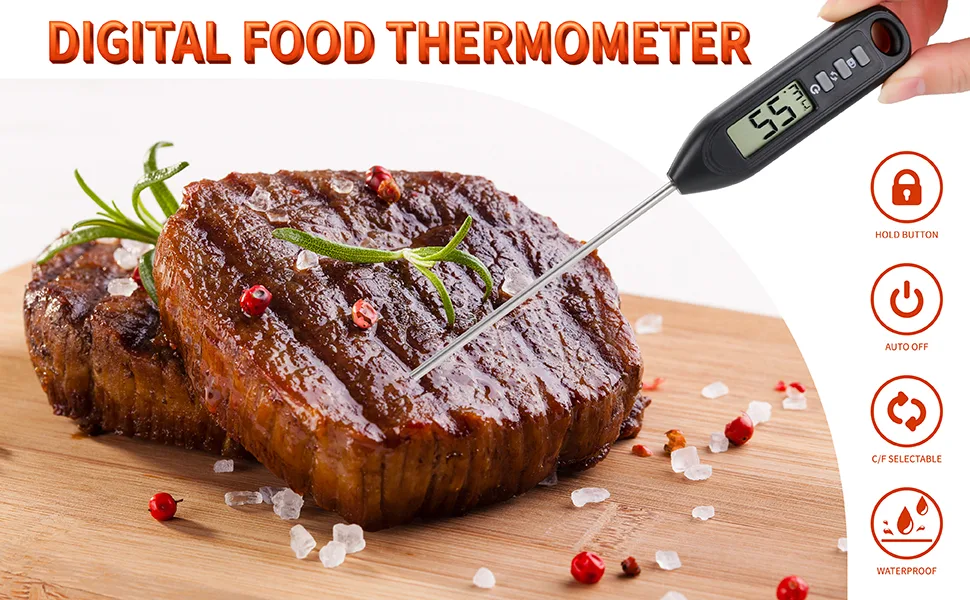
This step is non-negotiable. You cannot guess doneness and expect consistent results. The USDA safe minimum internal temperatures are:
| Meat Type | Safe Minimum Internal Temp |
|---|---|
| Chicken and poultry | 165°F (74°C) |
| Beef, pork, lamb (steaks, chops, roasts) | 145°F (63°C) with 3 min rest |
| Ground meats (beef, pork, lamb) | 160°F (71°C) |
| Fish | 145°F (63°C) |
Insert the probe into the thickest part of the meat, away from any bones. For steaks, aim for the center of the thickest muscle. For chicken breasts, insert from the side to reach the thickest point without touching the grate.
Pulling Meat Early: The Carryover Cooking Rule
Carryover cooking is the temperature rise that happens after you pull meat off the heat. The residual heat continues to cook the meat for several minutes. For a thick steak, that's 5 to 10°F.
For a chicken breast, it's 3 to 5°F.
So pull your steak at 135°F if you want medium-rare (145°F final). Pull your chicken at 160°F and let it rest to 165°F. This is the single most effective technique for preventing dry meat.
It's the difference between "done" and "overdone."

Similar Posts



















