How to Grill Vegetables in a Basket Perfectly
Learning how to grill vegetables in a basket changes the way you cook outdoors. It solves the oldest frustration in grilling: watching thin slices of zucchini, onion rings, and pepper strips slip through the grates and into the coals. A quality basket keeps everything contained while still letting the fire do its job.
A good grill basket reaches 375 to 450 degrees Fahrenheit in about 10 minutes. That is hot enough to caramelize natural sugars and create charred edges without turning the vegetables to mush. Our research across user reviews and manufacturer specs confirms one thing.
The basket is the simplest upgrade for better grilled vegetables. Here is how to use it correctly.
Quick Answer
To grill vegetables in a basket, preheat the basket for 10 minutes. Cut vegetables into even 3/4-inch pieces. Toss them with oil and seasoning.
Spread them in a single layer. Grill over medium-high heat for 8 to 15 minutes. Stir every 2 to 4 minutes.

Quick Answer: Why a Basket Beats the Grates (and When It Doesn't)
A grill basket solves a simple geometry problem. Grates have gaps. Vegetables are small.
Without help, they fall through.
If you have ever grilled thin asparagus or coin-sized zucchini slices, you know the pain. You rescue a few pieces with tongs and call it dinner. A basket ends that.
It holds every piece in one place.
But the basket does more than catch food. It also lets you toss vegetables as a batch. You drizzle oil and sprinkle salt, then shake the basket.
The seasoning coats everything evenly. You stir with tongs to char new sides. That is hard to do on open grates.
So when is a basket not the right tool? If you are grilling large pieces that sit flat on the grates anyway. Whole portobello caps, thick eggplant halves, or corn on the cob with the husk on do fine without a basket.
A basket would just make them harder to flip. Use it for small pieces, sliced pieces, or delicate items that would otherwise break apart.
If your vegetable can hold its shape on a grate, it may not need a basket. If it is smaller than a golf ball or thinner than a finger, the basket is your best friend.
Before You Start: What Kind of Basket Do You Have?
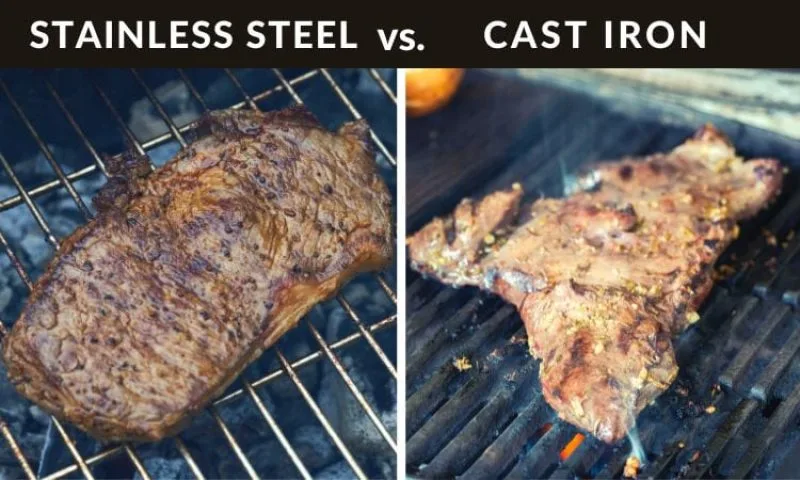
Your basket type changes your technique. Not all grill baskets behave the same way. Before you fire up the grill, take a look at what you have.
It will save you from burned food and frustration later.
Stainless Steel vs. Non-Stick vs. Cast Iron: What Changes in Your Technique
Three basket materials dominate the market. Each one grills differently.
Stainless steel is the workhorse. It is inexpensive and indestructible. But it is also the most likely to stick.
You must preheat the basket and oil it well before adding vegetables. Our research shows that a properly preheated stainless basket with oiled food rarely sticks. Skip the preheat and you will scrape zucchini off the metal.
Non-stick coated baskets are the easiest to clean. They require less oil and release food without a fight. But the coating has a hard temperature limit.
Most non-stick baskets should stay under 500 degrees Fahrenheit. Push past that and the coating can degrade or release fumes. If you want high-heat char, stainless or cast iron is safer.
Cast iron holds heat better than anything else. It sears vegetables like a skillet but lets air and smoke through. The downside is weight and maintenance.
Cast iron needs seasoning and careful drying. It might react with acidic marinades too. If you use lemon juice or vinegar on your vegetables, cast iron can pick up a metallic taste over time.
If you have stainless, preheat it and oil it. If you have non-stick, keep the heat below 500. If you have cast iron, season it and avoid acidic marinades.
Perforation Size: Why It Determines What You Can Grill
The holes in your basket matter as much as the material. Small holes keep small pieces from falling through. Large slots let more direct flame hit the food.
A fine mesh basket is ideal for cherry tomatoes, green beans, asparagus tips, or thin zucchini slices. Nothing escapes. But the mesh blocks some of the direct heat, so food may steam slightly more than char.
A wide-slot basket exposes vegetables to more flame. The char is better, the edges crispier. But small pieces will drop straight through.
If your basket has slots wider than a quarter-inch, avoid dicing your vegetables too small. Cut them into strips or large chunks instead.
Match the basket perforation to the vegetable. If you have a wide-slot basket, slice vegetables lengthwise into spears or thick strips. If you have a fine mesh basket, you can dice more freely.
The Shortcut: Know Your Vegetables Before They Hit the Heat
Not all vegetables cook at the same speed. If you throw everything into the basket at once, the dense vegetables will be raw when the soft ones are done. That is the fastest way to ruin a good batch.
The shortcut is to sort your vegetables by density and add them in shifts.
Hard Vegetables (Potatoes, Carrots, Broccoli): Parcook First
Dense root vegetables and cruciferous vegetables take too long to cook through on a hot grill alone. By the time the inside is tender, the outside is burned. Parcooking solves that.
Parcook hard vegetables for 3 to 5 minutes before they go into the basket. Boil, steam, or microwave them just until they start to soften. Drain them, dry them, then toss with oil and seasoning.
They will finish cooking on the grill in the same time as softer vegetables.
Potatoes, sweet potatoes, carrots, broccoli, cauliflower, and Brussels sprouts all benefit from this step. Cut them into small pieces first. Then parcook.
Then grill. If you skip the parcook, cut them into very thin slices instead so the heat reaches the center faster.
Medium Vegetables (Peppers, Onions, Mushrooms): Cut Evenly, Go Direct
Medium-density vegetables do not need parcooking. They grill well from raw, but only if you cut them to the right size. The goal is uniform thickness.
Bell peppers and red onions should be sliced into strips about 1/2-inch wide. Mushrooms can be halved or quartered depending on size. Thicker pieces take longer.
Thin pieces burn. Aim for everything to be roughly the same thickness so it finishes at the same time.
These vegetables go into the basket first. They can handle direct medium-high heat without turning to mush. They also release water as they cook, which can steam other vegetables if you crowd the basket.
Keep them in a single layer.
Soft and Quick Vegetables (Zucchini, Tomatoes, Asparagus): Add Them Last
Soft vegetables cook fast. Really fast. Zucchini coins, cherry tomatoes, asparagus spears, and thin eggplant slices all need less time over the fire.
Add them to the basket during the last 3 to 5 minutes of cooking.
If you add them at the start, they will collapse into mush before the peppers are even half done. Cherry tomatoes will burst and lose all their juice into the basket. Asparagus will turn limp and gray.
Keep soft vegetables separate until the final stretch. Toss them in oil and seasoning on the side, then slide them into the hot basket to warm and char quickly. They will stay intact and hold their texture.
Step-by-Step: How to Grill Vegetables in a Basket

Here is the full process from cutting board to serving platter. Each step matters. Skip one and the result changes.
Step 1: Cut for the Basket, Not for the Aesthetic
Cut your vegetables into even pieces before anything else. The target is 1/2 to 3/4 inch thick for most vegetables. Too thin and they burn.
Too thick and they cook unevenly.
For zucchini and yellow squash, slice them into half-moons or 1/2-inch rounds. Bell peppers go into strips. Onions become wedges or thick rings.
Mushrooms get halved or quartered. Cherry tomatoes can stay whole but pierce them with a toothpick to prevent bursting.
Uniformity is the goal. If every piece is the same thickness, every piece finishes at the same time. This is the single biggest factor in success.
Step 2: Oil the Vegetables, Not Just the Basket
A common mistake is dumping dry vegetables into a hot basket and hoping for the best. Instead, toss the vegetables in a bowl with oil first. Use 1 to 2 tablespoons of oil per pound of vegetables.
Olive oil works, but it has a lower smoke point than some alternatives. If you grill hot, avocado oil or grapeseed oil can handle more heat without smoking. Either way, coat the vegetables evenly.
The oil helps seasoning stick, prevents drying, and promotes browning.
Do not skip this step. A light coating is enough. Too much oil will drip through the basket and cause flare-ups.
The goal is a thin, even film on every piece.
Step 3: Preheat the Basket for Real Char
Put the empty basket on the grill while it preheats. Let it get hot for 5 to 10 minutes before adding food. This is especially important for stainless steel and cast iron baskets.
A hot basket sears the vegetables on contact, which prevents sticking.
If your basket is non-stick, you can preheat it too, but keep the heat under 500 degrees Fahrenheit. For stainless or cast iron, go hotter.
After the basket is hot, you can lightly oil it using tongs and a folded paper towel. Dip the towel in oil and wipe the inside of the basket. This adds a final non-stick layer.
But only do this if the basket has no food in it yet. Oil on a hot empty basket can smoke, so work quickly.
Step 4: Single Layer Is the Rule
Once the basket is hot, add the vegetables in a single layer. Do not pile them up. If vegetables stack on top of each other, the heat cannot reach every piece.
The bottom pieces steam while the top pieces char. You end up with uneven mush.
A medium basket holds about 3 to 4 cups of cut vegetables. That is enough for four to six servings. If you need more, cook in batches.
It takes a few extra minutes, but the result is worth it.
Spread the vegetables out with tongs. Give them space to breathe. The fire needs to hit every surface.
Step 5: Stir Every 2 to 4 Minutes
Once the vegetables are in the basket, do not walk away. They need attention. Every 2 to 4 minutes, give the basket a shake or toss the vegetables with tongs.
Stirring moves the pieces around. New sides get exposed to the heat. That creates even browning and prevents burning on any one side.
It also releases steam, which helps the vegetables char instead of stew.
If you have a lidded basket, you can shake it closed. If it is open, use long tongs to flip and move pieces. Work quickly so the lid does not stay open too long.
Step 6: Check, Rest, and Season Again
After 8 to 15 minutes, check for doneness. Pierce the thickest piece with a fork or skewer. It should slide in without resistance.
If there is crunch, give it another minute or two.
Do not rely on color alone. Charred edges are great, but they do not mean the inside is cooked. Dense vegetables like potatoes need longer than soft ones like zucchini.
That is why you added them in shifts.
When the vegetables are done, transfer them to a serving bowl. Let them rest for 2 to 3 minutes. This allows the residual heat to finish anything slightly underdone and keeps them from steaming on the hot basket.
Season again with a pinch of salt, pepper, or fresh herbs. A squeeze of lemon or a splash of vinaigrette brightens everything up. Serve hot or warm.
Grill Temperature and Timing Chart for Basket Vegetables
Grill temperature matters as much as timing. Most basket vegetables do best over medium-high direct heat, around 375 to 450 degrees Fahrenheit. That is hot enough to char the outside while the inside cooks through.
If your grill runs hot, drop it slightly. If it runs cool, extend the time.
Here is a practical chart for common vegetables. Times assume a preheated basket, a single layer, and stirring every few minutes.
| Vegetable | Cut Size | Grill Time | Notes |
|---|---|---|---|
| Asparagus | Whole spears | 6 to 8 minutes | Thin spears cook faster |
| Zucchini / Yellow Squash | 1/2-inch slices or half-moons | 8 to 10 minutes | Add in last 5 minutes |
| Bell Peppers | 1/2-inch strips | 10 to 12 minutes | Can handle direct heat |
| Red Onion | 1/2-inch wedges | 10 to 15 minutes | Charred edges are good |
| Mushrooms | Halved or quartered | 8 to 10 minutes | Release water as they cook |
| Eggplant | 1/2-inch slices | 10 to 12 minutes | Brush with oil well |
| Cherry Tomatoes | Whole | 6 to 8 minutes | Pierce to prevent bursting |
| Corn | Cut into 2-inch chunks | 10 to 12 minutes | Or leave whole on the grates |
| Green Beans | Whole | 10 to 12 minutes | Fine mesh basket works best |
| Brussels Sprouts | Halved | 12 to 15 minutes | Parcook 3 minutes first |
| Potatoes | 1/2-inch cubes | 15 to 20 minutes | Parcook 5 minutes first |
| Carrots | 1/2-inch slices | 12 to 15 minutes | Parcook 4 minutes first |
A few notes. If your basket has a lid, you can close it to trap heat and cook dense vegetables faster. If it is open, you may need to stir more often and extend the time slightly.
The chart assumes an open basket over medium-high heat.
Always verify with a fork. Times are a guide, not a rule. Vegetables vary by thickness, water content, and your grill's actual temperature.
A fork should pierce easily when they are done.

Similar Posts



















