Master Medium Heat Grilling: A Simple Guide
You've burned another chicken breast. Or maybe a pork chop that looks like a hockey puck on the outside but is still suspiciously pink inside. Sound familiar?
The problem isn't your cooking skills, it's your heat. Learning how to grill using medium heat is the single most important skill you can develop, because it's the sweet spot where food actually cooks through without incinerating on the surface.
Most home grillers default to "high" because they think it's faster and better. The reality? High heat is for searing thin cuts, not for cooking bone-in chicken or thick pork chops.
Medium heat, which lands between 350°F and 450°F on most grills, gives you the control you need for even cooking, better flavor, and fewer flare-ups. As of 2026, the USDA still recommends safe internal temperatures of 165°F for poultry and 145°F for pork, and hitting those marks consistently requires mastering this middle zone.
Quick Answer
Grill using medium heat by preheating your grill to 350°F, 450°F. Use the hand test: hold your palm 5 inches above the grate. If you can hold it for 5, 7 seconds, that's medium heat.
Set gas burners to medium. For charcoal, arrange coals in a single layer. Cook with the lid down.
Always verify doneness with an instant-read thermometer. Medium heat works best for chicken, pork chops, fish, and vegetables. It prevents burning and ensures food cooks through evenly.
Why Medium Heat is the Most Underrated Grilling Zone
We've all done it. Cranked the grill to maximum, thrown on the meat, and watched flames lick up the sides. It feels productive, like you're really grilling.
Then you slice into that chicken breast and find raw meat at the center while the outside looks like it fought a forest fire.
High heat has its place. Thin steaks, burgers, and quick-cooking items benefit from a blast of direct heat. But for anything thicker than an inch, high heat is a trap.
The surface burns before the interior has a chance to catch up.
Medium heat solves this by giving you a wider window. Instead of a race between the outside and the inside, you get a steady, even transfer of heat that cooks food from edge to center at roughly the same pace. The Maillard reaction, the chemical process that creates that golden-brown crust, still happens at 350°F.
It just happens more slowly, which means you have time to nail the doneness without holding your breath.
Our research across manufacturer guides and grilling forums shows that most backyard grilling failures, dry chicken, burnt exteriors, undercooked centers, trace back to the same mistake: skipping medium heat entirely. The fix isn't a new grill or fancy gadgets. It's learning to respect this temperature zone.
What Counts as Medium Heat, Exactly?
Here's where things get confusing. Different grills run at different temperatures on the same dial setting. A gas grill's "medium" might be 375°F on one brand and 425°F on another.
Charcoal grills are even less predictable, depending on how many briquettes you light and how open your vents are.
The generally accepted range for medium heat is 350°F to 450°F. That's the sweet spot. Below 350°F, you're in low-and-slow territory, which works for smoking but won't give you that grilled crust.
Above 450°F, you're approaching high heat, and the burn risk climbs fast.
For gas grills, this usually means setting your burners to a medium or medium-high position and letting the grill preheat for 10 to 15 minutes with the lid closed. For charcoal grills, you're looking at about 30 to 40 lit briquettes spread in an even layer, with the bottom vents roughly half open to control airflow.
Quick Answer: What "Medium Heat" Actually Means on Your Grill
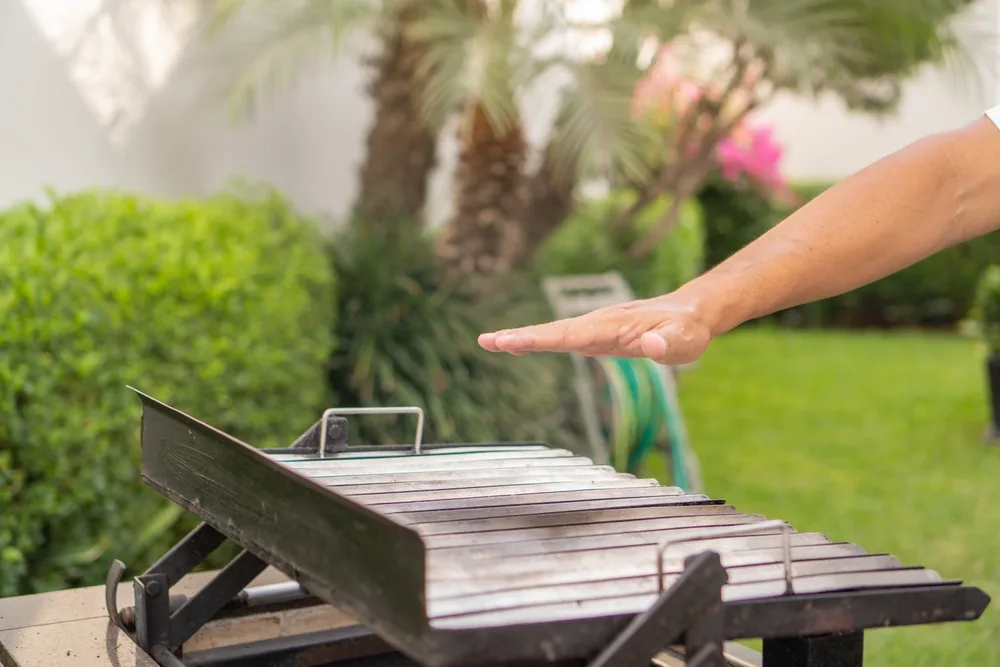
The most reliable way to know you're in the medium zone is the hand test. It's been used by grill masters for decades because it works, costs nothing, and takes less than 10 seconds.
Here's how it works: Hold your palm about 5 inches above the cooking grate. Use the hand you're not using for tongs or a spatula, so it's clean and dry. Then count slowly.
- 2 to 3 seconds: High heat (450°F+)
- 5 to 7 seconds: Medium heat (350°F to 450°F)
- 8 to 10 seconds: Low heat (250°F to 350°F)
- 10+ seconds: Too low for most grilling
If you can hold your hand there for a full 5 seconds but need to pull back before 7, you've found medium heat. It should feel hot enough that you're uncomfortable, but not so hot that you yank your hand away immediately.
That said, the hand test has its limits. It's subjective, and everyone's heat tolerance is different. For serious precision, use a grill thermometer.
Many modern gas grills come with built-in lid thermometers, though these measure air temperature at the dome, not the temperature right at the grate. An instant-read thermometer or a dedicated grill grate thermometer gives you the real picture.
A Quick Note on Grill Thermometers
Budget-friendly options start around $15 and clip directly onto the grate. They're accurate enough for most home grilling. If you want a faster reading, an infrared thermometer gun can measure surface temperature in seconds, though it won't tell you the internal temperature of the meat itself.
For that, you need a probe thermometer inserted into the thickest part of the cut.
Understanding Direct vs. Indirect Medium Heat
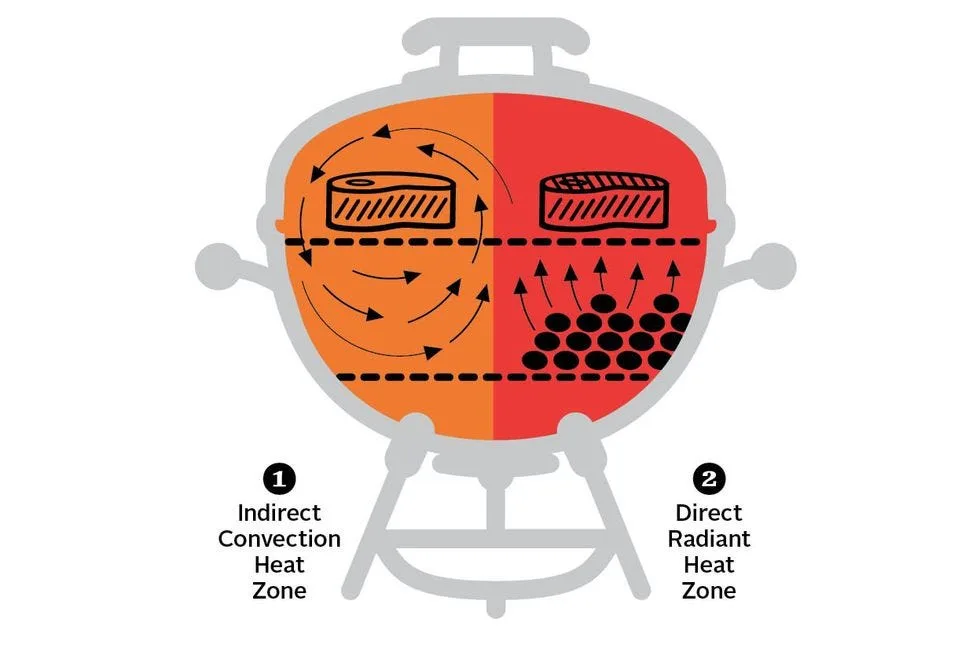
Here's where most guides lose people, but this distinction matters more than anything else you'll read today. Medium heat isn't just one thing. It's two different cooking methods that happen to use the same temperature range.
Direct medium heat means the food sits directly over the heat source, whether that's lit charcoal or a gas burner. The heat radiates straight up through the grate and cooks the food from below. This works well for thinner cuts that don't need much time: fish fillets, pork chops, sliced vegetables, and chicken parts that you can flip frequently.
Indirect medium heat means the heat source sits on one side of the grill, and the food sits on the other side. The grill lid closes, turning the whole unit into a convection oven. Hot air circulates around the food, cooking it evenly from all sides without direct flame contact.
This is the method for thicker cuts, bone-in chicken, and anything that needs more than 20 minutes.
Setting Up a Two-Zone Fire
The two-zone setup is just a fancy name for building both options into your grill at the same time. It's the most versatile configuration you can use, and it costs nothing to create.
On a charcoal grill, push all lit coals to one side of the charcoal grate. Leave the other side empty. That's the two-zone setup.
Put a drip pan under the empty side to catch fat and keep things clean.
On a gas grill, turn on the burners on one side to medium. Leave the burners on the other side off. You've just created a two-zone fire with zero effort.
Here's what you can do with it:
- Sear over direct heat to get color on your food, then move to indirect heat to finish cooking without burning
- Cook delicate items like fish on the indirect side to prevent flare-ups
- Handle meat that needs time, like whole chickens or thick pork roasts, without constant fear of burning
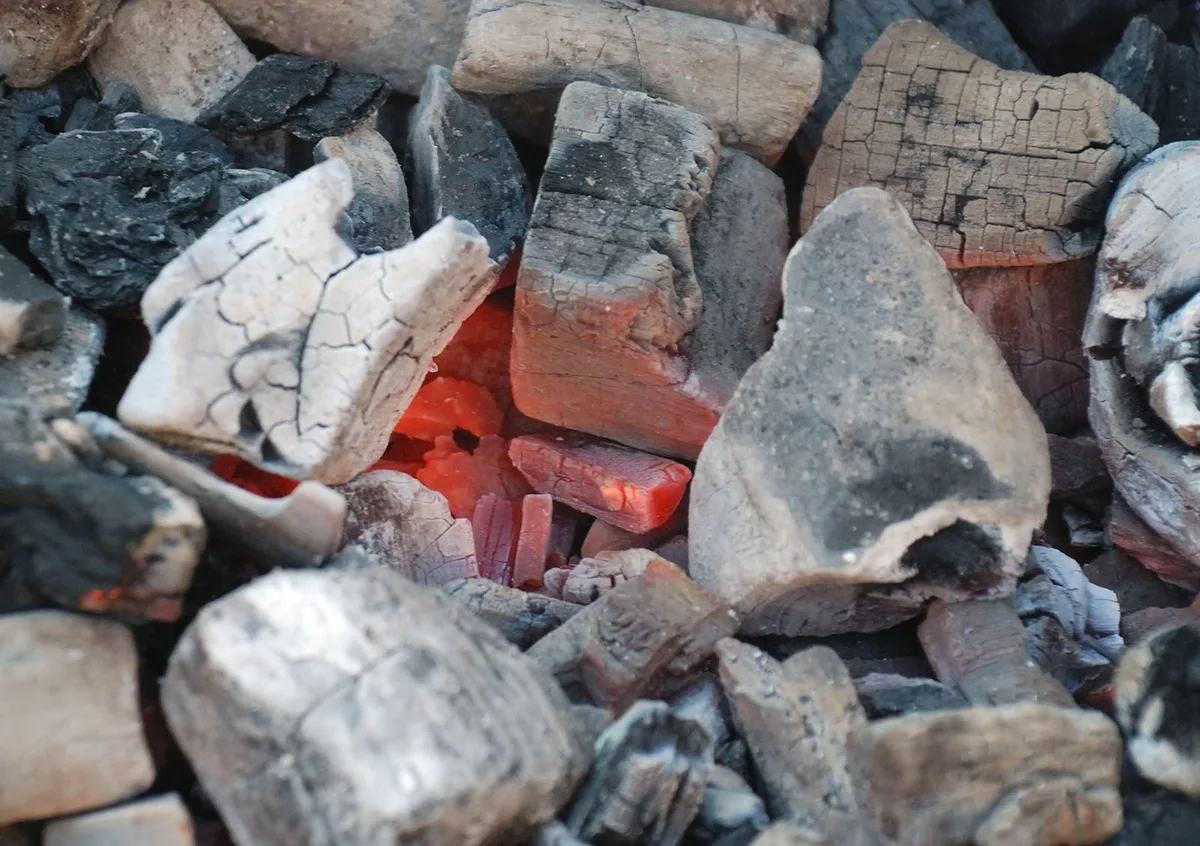
The image above shows exactly this setup: glowing coals concentrated on one side of a kettle-style grill, with a clean, empty zone ready for food. This is the configuration that separates decent grilling from consistently great grilling.
Setting Up Your Grill for Medium Heat
Now let's get practical. The setup process differs depending on what you're working with, so we'll break it down by grill type.
Gas Grill Setup for Medium Heat
Gas grills are easier to control, which makes them ideal for learning medium heat. The dial gives you a consistent, adjustable flame, and you can fine-tune with precision.
- Clean the grate. Scrape off residue from your last cook while the grill is warm. A clean grate prevents sticking and off-flavors.
- Preheat with the lid closed. Turn all burners to medium and close the lid. Give it 10 to 15 minutes. This lets the grates get hot, not just the air.
- Check your temperature. Use a grill thermometer or the hand test to confirm you're in the 350°F to 450°F range. If it's running hot, dial the burners back slightly.
- Create your zones. If you want a two-zone setup, turn one side to medium and leave the other side off after preheating.
- Oil the grate. Dip a folded paper towel in a high smoke-point oil like canola or avocado oil. Use tongs to rub it across the hot grate. This prevents sticking and helps create grill marks.
One warning: don't oil the grate with olive oil. Its smoke point sits around 375°F, right at your target range, which means it'll burn and leave a bitter residue. Stick with neutral oils that handle higher temperatures.
Charcoal Grill Setup for Medium Heat
Charcoal takes more work, but it rewards you with better flavor. The setup goes like this:
- Light a chimney starter full of briquettes. Wait until the coals are covered in a light gray ash, which takes about 20 to 25 minutes. This means they're fully lit and ready.
- Pour the coals into the grill. For medium heat, spread them in an even single layer across one side. That's roughly 30 to 40 briquettes depending on your grill size.
- Adjust the vents. The bottom vents control airflow, which controls temperature. More air equals hotter coals. Start with the bottom vents half open and adjust from there.
- Let the grill settle. Give it 10 minutes after pouring the coals. The temperature will stabilize as the airflow works through the grill.
- Test with the hand test. Once stable, confirm the medium range before adding food.
The biggest mistake charcoal beginners make is using too many briquettes. They pile on a chimney full, get an inferno, then struggle to cool it down. Starting with fewer coals is easier.
You can always add more if you need, but you can't quickly remove heat from lit coals.
Managing the Lid
During medium-heat cooking, keep the lid down as much as possible. Every time you open it, heat escapes, and the temperature drops. With a gas grill, it recovers in a minute or two.
With charcoal, each lid lift costs you more time and heat.
The exception is when you're searing over direct heat with the lid open to watch for flare-ups. Once you move food to the indirect side, close the lid and let it work.

Similar Posts



















