Master High-Heat Grilling: Tips for Perfect Sear
You know the feeling. You pull a steak off the grill, slice into it, and there it is: a sad, gray band of overcooked meat surrounding a decent center. Or worse, you crank the burners to max, toss on a chicken thigh, and within two minutes you're fighting a four-foot flame wall.
The problem isn't your grill. It's that no one ever showed you how to grill using high heat the right way.
High-heat grilling is the difference between a crust that shatters and a chew that tires your jaw. The Maillard reaction, the browning that creates all that flavor, kicks in when surface temperatures hit roughly 310°F. Most grills can easily reach 500°F to 650°F.
The trick is learning to control that heat instead of just surviving it. That's what this guide covers, from fire setup to temperature targets, so you can sear with confidence every time.
Quick Answer
High-heat grilling means cooking directly over a fire at 450°F to 650°F. Preheat your grill with the lid closed for 10 to 15 minutes. Set up two zones: one hot, one cooler.
Sear meat 60 to 90 seconds per side. Use an instant-read thermometer to check doneness. Manage flare-ups by moving food to the cool zone.
Why High-Heat Grilling Actually Works (and Why Most People Get It Wrong)
The magic behind high-heat grilling is chemistry. When meat hits a surface above 300°F, amino acids and sugars react and create hundreds of new flavor compounds. That's the Maillard reaction.
It's not just browning. It's the difference between a steak that tastes like a steak and one that tastes like boiled beef.
Most people get it wrong in one of two ways. Either they don't preheat long enough, or they flip the meat too often. Both mistakes lead to the same sad result: steamed, gray meat with no crust.
Here's what actually happens on a properly preheated grill. The intense heat rapidly evaporates surface moisture. Once the surface is dry, the meat begins to brown.
If you flip too early, the meat hasn't had time to release from the grates. It sticks, you tear it, and the juices run out.
Another common issue: crowding the grill. When you pile on six chicken thighs on a grate built for four, the temperature drops dramatically. The meat steams instead of sears.
You lose the crust and gain a rubbery texture. Leave space between each piece. Air needs to flow, and heat needs room to work.
What You Need Before You Light the Grill
You don't need a $2,000 setup to grill with high heat. But you do need a few essentials that make the difference between frustration and success.
The grill itself. Charcoal and gas both work. Charcoal runs hotter and adds smoky flavor. Gas is faster and easier to control.
More on that in the next section.
A chimney starter. If you use charcoal, this is non-negotiable. It gets coals glowing evenly in about 20 minutes without lighter fluid, which can leave a chemical taste on your food.
An instant-read thermometer. This is the single most important tool in high-heat grilling. Guessing by touch is unreliable. A good digital thermometer, like a ThermoPro or ThermoWorks, gives you an accurate reading in seconds.
High smoke point oil. Avocado oil (smoke point 520°F) or canola oil (400°F) are solid picks. Olive oil burns at high heat and creates bitter flavors.
A sturdy grill brush. Cleaning hot grates is a lot easier than scrubbing cold ones. A brass-bristle brush is standard, but if the bristles start shedding, switch to a grill stone.
| Tool | Why It Matters | Price Range |
|---|---|---|
| Chimney starter | Evenly lit coals, no lighter fluid | $15–$30 |
| Instant-read thermometer | Accurate doneness, no guesswork | $25–$60 |
| High smoke point oil | Prevents sticking, no burnt taste | $8–$15 |
| Grill brush | Clean grates, better sear marks | $10–$20 |
| Heat-resistant gloves | Protect hands near open flame | $15–$40 |
Gas vs. Charcoal: Which One Wins for High Heat?
This is the eternal backyard debate. Here's the honest breakdown.
Gas grills are about control. You turn a dial, and you get consistent heat. Most modern gas grills have three burners, so you can run one at high, one at medium, and keep one off for indirect cooking. The downside is that gas grills rarely exceed 600°F unless they have an infrared sear burner.
Charcoal grills are about raw power. A loaded kettle grill can hit 700°F or more. The coals radiate intense heat that dries the meat's surface and creates a serious crust. The trade-off is time.
You need 20 to 30 minutes to get the coals ready, and you have less temperature control.
If you're searing once or twice a week, gas is the practical pick. If you're chasing the best possible crust and don't mind the ritual, charcoal wins every time.
What about infrared burners? Higher-end gas grills offer a dedicated sear zone that uses infrared technology to reach 700°F or hotter. These are great for thick steaks and do a genuinely impressive job with the crust. They aren't just a gimmick, though they do add $200 to $500 to the price of a grill.
How to Set Up a Two-Zone Fire Every Time
The two-zone fire is the foundation of all good grilling. It gives you a hot side for searing and a cool side for flare-ups and finishing.
For charcoal grills: Light a full chimney of charcoal. When the coals are covered with gray ash, dump them carefully to one side of the grill. Leave the other side empty.
Now you have two zones. The hot side sits at 500°F to 650°F. The cool side runs at 300°F or lower.
This setup lets you sear on the coals, then move food to the cool side if it's cooking too fast or if flames flare up.
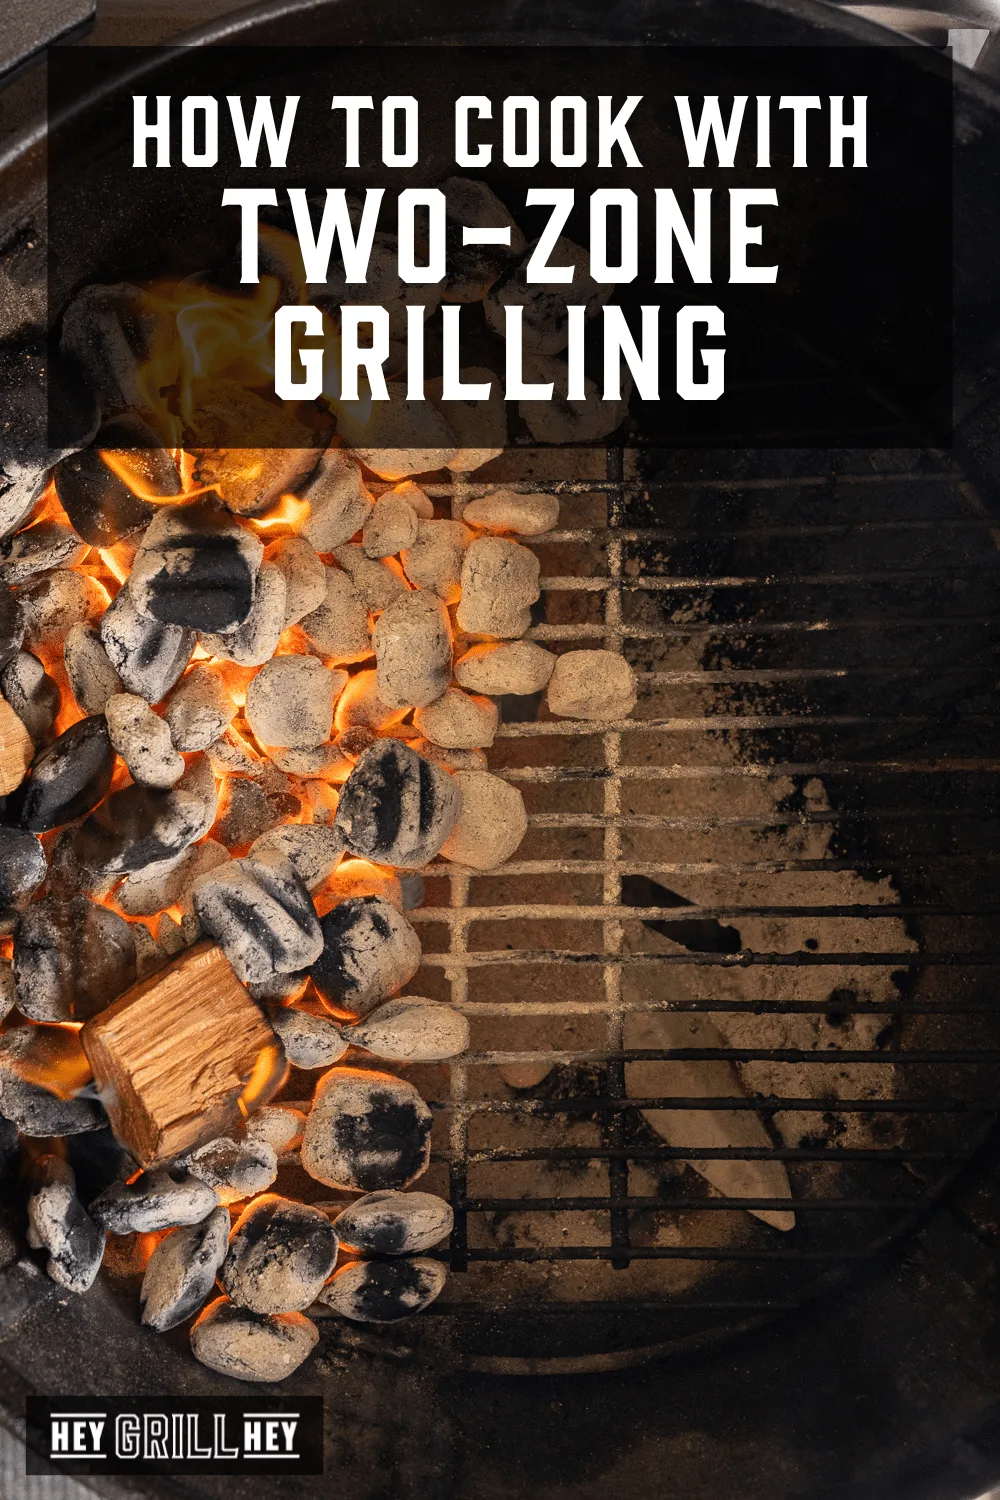
For gas grills: Turn one burner to high and another to medium. Leave the third off if you have one. This creates the same hot and cool zones.
Close the lid and let it preheat for 10 to 15 minutes before placing anything on the grates.
How to know your grill is hot enough. The hand-test method works in a pinch. Hold your hand about 5 inches above the grate. If you can hold it there for 2 seconds, you're at high heat, roughly 500°F to 600°F.
If you need to pull away after 3 seconds, you're at medium heat, around 375°F to 450°F. For most searing applications, you want the 2-second zone.
A quick note on airflow for charcoal. The bottom vents control how much oxygen feeds the fire. Wide open means maximum heat. Half closed means less.
If your coals are blazing too hot, adjust the bottom vent before moving the food. Getting comfortable with this one lever will change how you grill.

Similar Posts



















