Pre-Grill Checklist: 7 Essential Steps Before You Cook That
If you’re asking “what should i do before using a gas grill,” the short answer is a safety sequence, not a quick wipe-down. You’re about to open a valve on a pressurized fuel tank and introduce an open flame. Small oversights turn into flashbacks, grease fires, or worse.
Most grill incidents every year trace back to three things: a blocked burner tube, a cracked hose, or a forgotten grease tray.
The National Fire Protection Association tracks grill fires closely. Their data shows gas grills cause more home fires than charcoal, and as of 2026 the seasonal pattern hasn’t changed. Most happen between May and August.
This guide walks you through the exact pre-use order that prevents those fires. You’ll learn what to inspect, how to test for leaks, and why the ignition sequence matters more than most people think.

Quick Answer
Before using a gas grill, empty the grease tray. Check the hose and regulator for cracks. Clear spider webs from the burner tubes.
Do a soapy water leak test on every gas connection. Open the lid before turning on the gas. Wait a few seconds.
Then ignite.
Why a Pre-Use Gas Grill Check Is Non-Negotiable
A gas grill is a small outdoor appliance until something goes wrong. Then it becomes an unplanned fire source sitting next to your house. The National Fire Protection Association reports that gas grills were involved in an average of 8,900 home fires per year over a recent five-year span.
That’s not a scare tactic. It’s a reason to treat the pre-use check like a pilot’s preflight routine.
The components that cause trouble are hidden in plain sight. Spiders love the small openings in venturi tubes. Grease builds up under the burners faster than most owners expect.
Rubber hoses dry out, crack, and leak gas slowly. You won’t always smell it, especially outdoors with a breeze.
Skipping the check doesn’t mean the grill will fail. It means you’re betting it won’t. That’s a bad bet when the stakes are a grease fire or a gas flashback.
A few minutes of inspection costs nothing. The alternative can cost a deck, a wall, or a trip to urgent care.
The 60-Second Pre-Grill Safety Scan
Not every use requires a full teardown. For a grill you used last weekend, a fast visual and sensory scan works. If you haven’t used it in weeks, or if it sat through rain, snow, or high humidity, slow down and do the full step-by-step later in this guide.
But everyone should do this quick pass first.
Here’s the 60-second scan before touching any knobs:
- Stand next to the grill and smell for gas. A strong rotten-egg odor means stop. Do not light anything.
- Look under the grill. Check for pooled grease, rust flakes, or evidence of rodents.
- Squeeze the hose gently along its full length. Cracks, stiffness, or soft spots fail the test.
- Make sure the propane tank is upright and stable. A tilted tank can feed liquid propane into the regulator.
- Open the lid fully and look at the burner area. Anything blocking the holes, like foil or debris, needs removal.
- Confirm the area around the grill is clear. No paper plates, towels, or dry leaves within three feet.
If any of these raise a question, move to the detailed checks. If everything feels right, you can proceed to the ignition sequence.
Know the Parts That Carry Fuel and Flame
You don’t need to be a technician. But knowing which parts carry gas and which ones direct flame makes every inspection faster. Three assemblies do almost all the work.
Propane Tank, Regulator, and Hose Assembly
This is the fuel supply chain. The tank holds liquid propane under pressure. The regulator drops that pressure to a safe level for the burners.
The hose carries the gas from the tank to the manifold. Problems here usually mean leaks, which you can’t always smell from a distance.
Check the tank collar for the DOT certification date. Tanks need periodic requalification. Check the hose for cracks, especially where it bends near the regulator.
Check the regulator vent hole. If that hole is blocked by dirt or an insect, the regulator can’t breathe and pressure control fails.
Burner Tubes, Venturi Tubes, and Orifices
Burner tubes are the long metal pipes where the flame comes out. Venturi tubes are the narrow sections at the front of each burner that mix gas with air. The orifice is the tiny brass fitting where gas enters the venturi.
That mixing zone is the most common hidden problem spot.
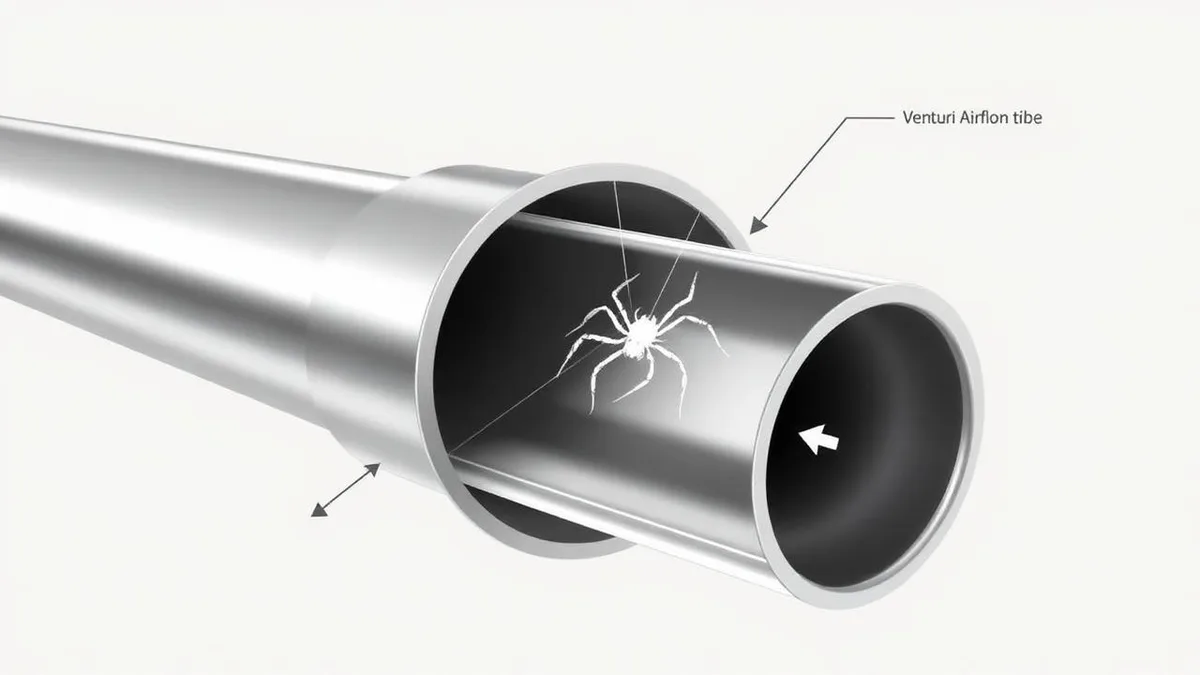
Spiders and wasps crawl into the venturi opening during storage. They build nests inside. When you light the grill, the gas can’t flow properly.
Instead it backs up and ignites outside the burner, a condition called flashback. That’s a small fire at the wrong end of the tube, right near the knobs and gas line.
Grease Tray, Drip Pan, and Heat Tents
Grease doesn’t just make a mess. It’s fuel. The drip pan sits under the burners and catches drippings.
The grease tray slides out below. Heat tents sit above the burners to vaporize drippings and reduce flare-ups. When any of these get overloaded, they become a fire waiting for a spark.
Always check the grease tray first. It’s the fastest thing to empty and the most common cause of a grill fire that spreads beyond the cooking surface.
Step-by-Step: What to Do Before Turning on the Gas
This is the full pre-use sequence. Do it in order. Each step builds on the one before it.
The goal is to eliminate every variable that could cause a flare-up, a leak, or a delayed ignition.
1. Empty and Inspect the Grease Tray First
Slide out the grease tray or drip pan. Scrape the hardened grease into a metal container or a lined trash can. Don’t wash it down a sink.
Reinstall the tray, but don’t skip looking underneath. Excess drippings can run down the back of the grill cabinet and pool under the tank.
If the tray has a disposable liner, replace it. If it’s a solid metal tray, you can line it with foil to make next time easier. But never leave wet grease in the tray.
It attracts pests and becomes rancid.
2. Remove Burner Tubes and Clear Spider Nests
Most gas grills let you lift out the burners after removing a single screw or cotter pin. Do that. Look into each venturi tube opening.
Use a small bottle brush, a pipe cleaner, or a stiff wire to push out any webbing, egg sacs, or dead insects.
Compressed air works well here if you have a can. Spray from the burner end toward the venturi opening so debris blows out, not deeper in. Reinstall the burners and make sure each one sits flat over its orifice.
A misaligned burner will produce uneven flames and can trap gas.
3. Check the Hose and Regulator for Cracks or Rot
Run your fingers along the entire hose from the tank connection to the grill manifold. Feel for dry cracks, soft spots, bulges, or exposed braiding. Look at the tight bends near the regulator and where the hose passes through the cabinet wall.
Those are the first places rubber fails.
If you find any crack or deep wear, replace the hose before using the grill. Do not wrap it in tape. Tape does not stop a high-pressure gas leak.
A replacement hose and regulator kit costs far less than a fire.
4. Do a Soapy Water Leak Test on Every Connection
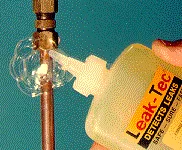
This is the real leak test. Mix equal parts dish soap and water. You can use a spray bottle or a small paintbrush.
Turn on the tank valve but leave all burner knobs off. Brush or spray the soapy solution on every connection point: the tank valve threads, the regulator coupling, the hose fittings, and the manifold inlet.
Watch for growing bubbles. Small, stable bubbles from the soap itself are normal. Expanding bubbles that form a cluster mean gas is escaping.
Tighten the connection hand-tight and retest. If bubbles still grow, close the tank valve and replace the fitting or hose before proceeding.
5. Verify the Tank Level and Valve Condition
A full 20-pound propane tank weighs about 37 to 39 pounds. Lift it or check a pressure gauge if you have one. But don’t rely on a gauge alone.
The best check is weight. If the tank feels light and you’re unsure, exchange it before starting the grill.
Look at the tank valve opening. It should be clean and free of rust. The QCC1 hand wheel should turn smoothly.
Never use pliers or a wrench on the tank hand wheel. Over-tightening can strip the threads and create a permanent leak at the worst possible spot.
Here’s a quick reference for what you’re checking and why:
| Inspection Point | What You’re Looking For | Common Problem |
|---|---|---|
| Grease tray | Level of grease and debris | Grease fire fuel source |
| Venturi tubes | Webbing, nests, dead bugs | Flashback at the tube opening |
| Hose surface | Cracks, soft spots, stiffness | Slow gas leak you can’t smell |
| Soapy water connections | Expanding bubbles | Active gas leak at a fitting |
| Tank collar | DOT date stamp and valve cleanliness | Expired cylinder or cross-threading |
The Correct Ignition Sequence (Open Lid First, Always)
This is where most accidents happen. People close the lid to “heat up faster,” then hit the igniter. That traps gas inside the cookbox.
One spark and the lid blows open, or worse. Always open the lid before any gas flows.
The safe order matters just as much as the open lid. Turn the tank valve on first, but slowly. A sudden blast of propane can damage the regulator.
Wait about 30 seconds. That gives the gas time to fill the manifold without pressure spikes. Only then turn one burner knob to high and press the igniter.
If the burner lights, leave the lid open for two or three minutes. This lets any residual gas clear. Then you can close the lid and let the grill preheat.
If the burner does not light on the first or second click, turn off the burner knob, wait a minute, and try again. Never hold the igniter down while turning multiple knobs on and off.
A second burner should light from the first one once it’s burning. Turn on additional burners only after the first is confirmed lit. This prevents gas from pooling in an unlit burner tube before ignition.
That pooled gas is exactly what causes a delayed ignition whoosh when the flame finally reaches it.
Common Pre-Season Problems and How to Fix Them
A grill that sat unused for months rarely fires up perfectly. Here are the three issues that show up most often, plus how to solve them before you cook.
Flashback and Yellow Flames from Blocked Venturi Tubes
Blocked venturi tubes cause two visible symptoms. The flame burns yellow instead of blue, meaning incomplete gas mixing. Or you hear a low rumbling sound near the control panel, meaning gas is burning inside the tube itself.
Both mean the same thing: something is blocking the air intake.
Clear the tube with a pipe cleaner or compressed air. Then relight and watch the flame. It should be mostly blue with small yellow tips.
A fully yellow flame means air is still restricted. Shut it down and clean again. Do not cook on a burner producing yellow flames.
It dumps carbon monoxide and soot into your food and the surrounding air.
Seized Regulator After Winter Storage
A regulator that won’t let gas flow usually has one of two causes. The first is a stuck internal diaphragm from moisture or corrosion during storage. The second is a tripped safety mechanism.
Newer regulators have a flow-limiting device that trips when it senses a sudden pressure surge.
The fix for a tripped regulator is simple. Close the tank valve fully. Disconnect the regulator from the tank.
Wait 30 seconds. Reconnect it hand-tight. Open the tank valve very slowly, about a quarter turn per second.
The slow opening prevents the surge that trips the limiter. If gas still won’t flow after two attempts, replace the regulator. They’re inexpensive and non-repairable.
Gas Smell but No Flame: Cross-Threaded or Closed Valve
You turn on the tank, open a burner, press the igniter, and nothing happens. But you can smell gas. Close everything immediately.
The likely culprit is a cross-threaded tank connection. The gas is escaping at the coupling instead of flowing through the hose.
Check that the regulator coupling sits square on the tank valve. Unscrew it and thread it back on slowly, turning counterclockwise as you face the connection. Go hand-tight only.
If the smell persists after retightening, do the soapy water test at that connection. Bubbles confirm the leak. Stop and replace the coupling or tank before lighting anything.
Where You Grill Matters: Clearance, Codes, and Ventilation
Placement errors are silent hazards. A grill too close to a wall, under an overhang, or inside a garage can turn a small flare-up into a structure fire. The general rule from fire safety organizations is a minimum ten-foot clearance from combustible surfaces.
That includes siding, deck railings, overhangs, and low tree branches.
Balconies and patios come with stricter rules. Many municipalities ban gas grills on balconies of multi-family buildings entirely. Others require specific distances from doors and windows.
Check your local fire code before setting up. If you live in an apartment or condo, the property manager usually has the written policy.
Ventilation is the other piece. Outdoor is the only acceptable place for a gas grill. Never fire it up inside a garage, even with the door open.
Carbon monoxide builds fast in enclosed spaces. The same rule applies to covered porches with low clearance. If you can’t stand fully upright with at least a foot of headroom above the grill, move it somewhere else.
Propane vs. Natural Gas: Pre-Use Checks Differ Slightly
If you have a propane grill, the tank itself is a checkable, portable item. You look for leaks at the tank coupling. You check the tank weight.
You verify the DOT date stamp. Those steps don’t apply to a natural gas setup.
Natural gas grills connect to your home’s gas line through a quick-disconnect fitting. There’s no tank to weigh. Instead, inspect that quick-disconnect coupling and the shut-off valve at the house line.
Make sure the gas valve at the wall is fully open and not partially closed. A half-open valve causes weak flames and uneven heat.
Both fuel types share the same burner and hose checks. The difference is the source connection. A propane grill is self-contained, so you manage the fuel supply.
A natural gas grill relies on the house line, so you verify that the connection is intact and the shut-off is working. Either way, never skip the soapy water test on the main connection.
How to Inspect Before First Use of a New or Stored Grill
A brand-new grill out of the box needs almost the same checklist as one that’s been in storage. Assembly defects, shipping damage, and missing parts all show up in the first inspection. Start by removing every piece of foam, plastic wrap, and zip tie from inside the cookbox and burner area.
Check that the burner tubes are seated correctly on their orifices. A burner that shifted during shipping can misalign and fail to light. Tighten all visible nuts and bolts.
The manifold bolts are especially important. A loose manifold connection is a built-in gas leak from day one.
For a grill that’s been in a garage or shed for months, open the lid and look for signs of rodents. Mice chew wires and build nests inside grill cabinets. Look for shredded material, droppings, or chewed igniter wires.
If you find any, clean it all out before connecting gas. Check the igniter battery too. A dead battery means no spark, which leads people to turn knobs longer than they should while gas accumulates.
When to Replace the Hose, Regulator, or Tank Instead of Cleaning
Some parts are cleanable. Others are replaceable. Knowing the difference saves time and prevents accidents.
The hose and regulator fall into the replace category. The burner tubes and grates fall into the clean category, unless they’re rusted through.
A hose older than five years should be replaced regardless of appearance. Rubber degrades even when it looks fine. The same goes for regulators with visible rust, a stuck vent hole, or a cracked housing.
A tank is replaceable if the DOT date stamp on the collar is more than twelve years old, or if the relief valve or threads show damage.
Here’s a quick decision guide:
| Part | Clean It If | Replace It If |
|---|---|---|
| Burner tubes | Clogged with webs or debris | Rusted through or warped |
| Cooking grates | Greasy or carbonized | Flaking, rusted, or deeply pitted |
| Hose | Dirty surface | Cracks, soft spots, or over 5 years old |
| Regulator | Surface dust | Rusted, no gas flow, or cracked housing |
| Tank | Surface dirt | Expired DOT date or damaged valve threads |
If a part carries gas under pressure, lean toward replacement. If it only touches food or flame, cleaning is usually enough. When in doubt, replace.
A new hose and regulator kit costs less than most steak dinners. The risk they prevent costs far more.
Real Pre-Use Scenarios: Backyard, Balcony, and Camping
A backyard grill needs the full checklist, especially if it sits uncovered through winter. A balcony grill adds clearance and code concerns, so check local rules before lighting. A camping or tailgating grill usually travels in a vehicle, which loosens fittings and lets bugs in.
Inspect the hose and venturi tubes every time you set it up.
Frequently Asked Questions About Gas Grill Prep
How often should I clean my gas grill burners?
Clean burner tubes at least once per season, or more often if you store the grill outdoors. Spiders and grease build up quickly in warm weather.
Can I use a gas grill if the igniter is broken?
You can light it manually with a long match or lighter, but only after checking for leaks. A broken igniter is a convenience issue, not a safety pass.
Do I need to preheat a gas grill before cooking?
Yes. Close the lid after lighting and let it reach 500 to 550 degrees Fahrenheit. That burns off residue and seasons the grates.
The Complete Before-Lighting Checklist (Print or Save)
- Open the lid fully.
- Empty the grease tray.
- Clear venturi tubes with a brush or air.
- Inspect the hose and regulator for cracks.
- Check the tank level and valve threads.
- Do the soapy water leak test on every connection.
- Turn the tank valve on slowly.
- Light one burner first, then add others.

Similar Posts



















