Grill Perfect Baked Potatoes: Easy Gas BBQ Method
Baked potatoes straight off the gas grill are a different beast than oven-baked ones. The skin picks up a subtle smokiness you just can't fake indoors, and the interior turns fluffy while the exterior crisps up beautifully. If you've ever wondered how to cook baked potatoes on a gas grill without ending up with charred skins and raw centers, the answer comes down to one thing: heat management.
The good news is that you don't need fancy equipment or decades of grilling experience. As of 2026, most modern gas grills come with at least three burners, which is exactly what you need for the indirect heat method. Manufacturer specifications indicate that a standard 3-burner gas grill holds a steady 375°F to 425°F, which is the sweet spot for baking potatoes.
Let's walk through the process so you get it right the first time.
Quick Answer
Cook baked potatoes on a gas grill using indirect heat. Preheat the grill to 375°F to 425°F. Scrub, pierce, oil, and salt the potatoes.
Place them on the cooler side of the grill. Close the lid and cook for 45 to 60 minutes. Rotate every 20 minutes for even cooking.
Remove at 205°F, rest, and serve.
Why a Gas Grill Makes a Different Potato Than an Oven
Ovens bake with dry, still air. Gas grills introduce smoke, moisture, and direct radiant heat. That changes the potato in two ways.
First, the skin. On a grill, the skin gets exposure to smoke and slight char. It comes out crispier and more flavorful than anything an oven can produce.
The smokiness is subtle, but it's enough to make people ask what you did differently.
Second, the texture. Grill hot spots and airflow patterns vary, so the potato cooks more slowly and evenly when you set up indirect heat properly. The interior has time to steam and break down starches into that classic fluffy texture.
Cut one open and it practically steams.
The tradeoff is attention. An oven is set-and-forget. A grill requires you to monitor heat zones, rotate potatoes, and manage flare-ups.
That's the cost of better flavor.
What You'll Need: Ingredients and Gear for Grill-Baked Potatoes
Before you light anything, gather your supplies. Here's what the standard setup looks like:
| Item | Purpose |
|---|---|
| Russet potatoes (6–8 oz each) | Best texture for baking; high starch content |
| Gas grill with lid | Traps heat to create oven-like environment |
| Aluminum foil | Optional; for softer skin and faster cook |
| Olive oil or vegetable oil | Helps salt stick and crisps the skin |
| Kosher salt | Seasoning layer on the exterior |
| Fork | Piercing potatoes to vent steam |
| Instant-read thermometer | Checking internal doneness (205°F–210°F) |
| Heat-resistant gloves | Safe handling of hot foil and potatoes |
| Drip pan (foil) | Catches oil drips and prevents flare-ups |
Russets are the right choice here. Aggregated user reviews and culinary standards agree: their high starch content yields the fluffiest interior. Waxy potatoes like reds or Yukon Golds hold shape better for boiling or roasting, but they come out dense when baked whole.
You can skip the foil if you want crispy skin. You can skip the oil if you're watching calories, but the skin will dry out. Stick with the basics above for your first attempt, then adjust to taste.
Setting Up Your Gas Grill for Indirect Heat
This is the most important step. Direct heat will give you burnt exteriors and raw centers every time.
How to Arrange the Grates and Drip Pan
Start by preheating your grill with all burners on high for 10 to 15 minutes. You want the grates hot enough to sear, even though you won't sear the potatoes directly.
Once preheated, adjust the burners. For a three-burner grill, light the left and right burners, and leave the middle one off. For a two-burner model, light one side only.
The unlit side becomes your baking zone.
Place a foil drip pan on the unlit side, directly under where the potatoes will sit. This catches any oil that drips off the potato skins. It also prevents flare-ups, which happen when oil hits the hot burners on the lit side.
Close the lid and let the temperature settle. Target 375°F to 425°F on the grill's built-in thermometer. If your grill doesn't have one, use a probe thermometer clipped to the grate.
That reading matters more than the dial.
Visual check: you should see flame on one side and nothing on the other. The grates on the cool side should look dry, not glowing. If they're still glowing red, you're too close to the heat source.

Step-by-Step: How to Cook Baked Potatoes on a Gas Grill
Now that the setup is right, here's the full process from start to finish.
Scrubbing, Piercing, and Seasoning the Potato
Start with clean spuds. Scrub each potato under running water to remove dirt and grit. Dry them thoroughly with a kitchen towel.
Wet skin steams instead of crisping, which is exactly what you're trying to avoid.
Pierce each potato 4 to 6 times with a fork. This vents steam during cooking. Skip this step and the potato can burst from internal pressure.
It's messy and dangerous, so don't skip it.
Coat the potatoes lightly with oil. Use your hands or a basting brush to cover the entire surface evenly. Then season generously with kosher salt.
The salt sticks to the oil and creates a seasoned crust as the potato bakes.
Some recipe guides suggest wrapping in foil at this point. That's a choice, not a requirement. Foil traps steam, which means softer skin and slightly faster cooking.
No foil means crispier, more flavorful skin. For your first attempt, skip the foil and go for the smoky, crispy version. You can always experiment later.
Placing the Potatoes and Managing the Heat
Set the potatoes directly on the unlit side of the grill, spaced at least an inch apart. This allows hot air to circulate around each one. Cramming them together creates cold spots and uneven cooking.
Close the lid immediately. The grill becomes a convection oven at this point, with the lit burners providing heat and the closed lid circulating it. Every time you open the lid, you lose heat and add cook time.
Initial cook: let the potatoes sit undisturbed for 20 minutes. Resist the urge to peek. Patience here pays off.
Rotating and Checking Progress
After 20 minutes, open the lid, flip each potato with tongs, and rotate it 180 degrees. This ensures even heat distribution. Potatoes near the lit burners cook faster, so swap the outer potatoes with the inner ones.
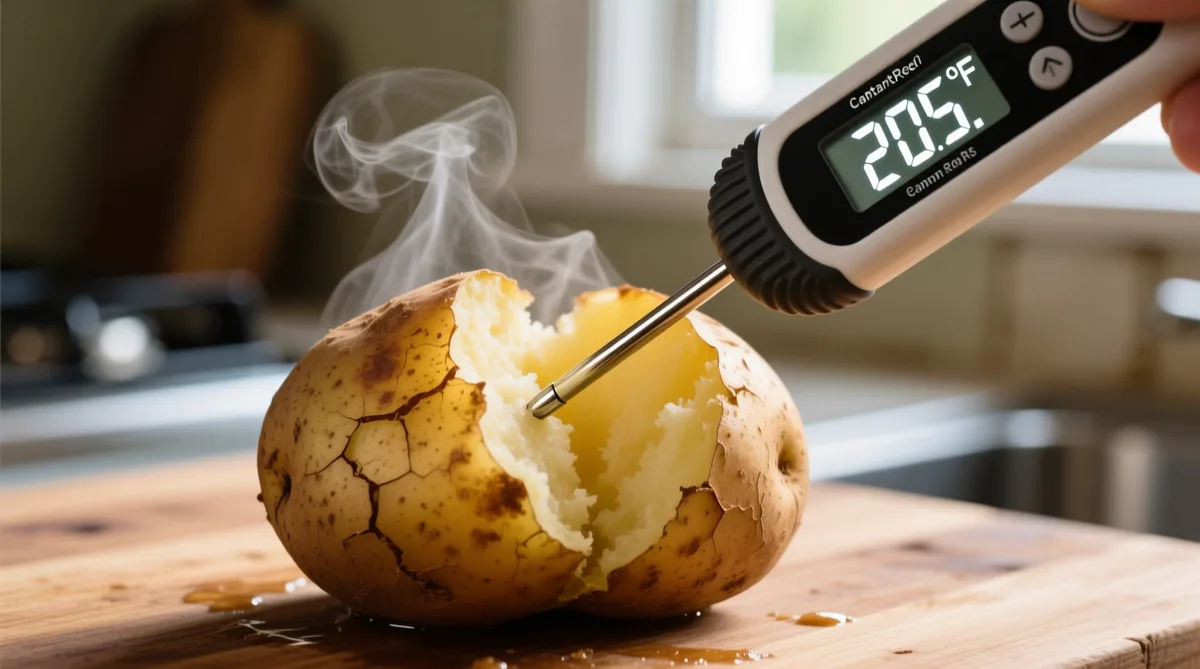
Close the lid and cook for another 20 minutes. At the 40-minute mark, check the temperature. Insert the probe into the thickest part of the largest potato.
You're looking for 205°F to 210°F.
If they're not there yet, return the lid and check every 10 minutes. Smaller potatoes may finish at 45 minutes. Larger ones can take up to 70 minutes.
The thermometer is your authority here, not the clock.
Testing for Doneness, Resting, and Fluffing
When the internal temperature reads 205°F to 210°F, they're done. Remove the potatoes with tongs and set them on a cutting board.
Let them rest for 5 minutes. This allows the interior to settle and the starches to finish absorbing moisture. Cutting early releases steam and leaves the interior gluey.
After resting, slice each potato down the middle, push the ends toward each other to fluff the interior, and add your toppings. Butter, sour cream, chives, cheese, bacon bits, whatever you like. The skin will be crispy, the center fluffy, and there's a hint of smoke running through every bite.
How to Read Your Potato: Visual and Tactile Cues for Done
The thermometer is the most reliable tool, but it's not the only way to tell if your potato is finished. Learning to read the visual and tactile cues helps you cook with confidence, even if you forget the probe inside.
Squeeze test. Pick up the potato with tongs or a gloved hand. Gently squeeze the sides. A done potato gives slightly under pressure, like a ripe avocado.
An underdone potato feels hard and unyielding. This is the same test professional chefs use in commercial kitchens.
Skin appearance. The skin should look dry and slightly wrinkled. It should have a matte finish, not a glossy or wet sheen. If it looks shiny, moisture is still escaping, which means it's not done yet.
If the skin looks tight and drum-like, it needs more time.
Visible steam vents. Piercing holes should show wisps of steam escaping. That steam is moisture leaving the potato as the starches break down. When the steam stops, the interior has essentially finished cooking.
The fork test. Insert a fork into the center. It should slide in with minimal resistance. You should feel a slight give, not a hard crunch.
If the fork meets resistance, put it back on the grill.
These cues are especially helpful when the grill's built-in thermometer runs hot or cold. Trust your senses over the dial.
Foil vs. No Foil: What the Potato Looks Like Either Way
This is the most debated question in grill-baked potato circles. Here's what actually changes.
Foil-wrapped potatoes. The foil traps steam and essentially steams the potato while it bakes. The skin comes out soft and tender, not crispy. Some people prefer this texture because it absorbs butter and toppings better.
The tradeoff is that you miss out on the smoky flavor and char that make grilled potatoes special. Additionally, foil-wrapped potatoes take slightly less time to cook, usually 40 to 50 minutes.
Unwrapped potatoes. The skin dries out, crisps up, and picks up smoke flavor directly from the grill atmosphere. This is the version that tastes distinctly like it came off a grill rather than an oven. Cook time ranges from 45 to 60 minutes.
The downside is that the skin can be tough if you cook at too high a temperature, so you need to maintain the 375°F to 425°F zone.
Hybrid approach. Start unwrapped for the first 30 minutes, then wrap loosely for the final 15 to 20. You get the crisp skin formation early and the steamy finish that makes the interior extra fluffy. This is a solid option if you want the best of both worlds.
If you go the foil route, wrap each potato individually and place them seam-side down. That prevents the foil from opening during cooking and keeps the moisture sealed inside.
Common Visual Mistakes That Ruin Grill-Baked Potatoes
Even experienced grillers mess up baked potatoes. Here are the most frequent failures and what causes them.
Burnt Skin, Raw Center
This happens when you use direct heat or run the grill too hot. The exterior cooks fast while the interior lags behind. By the time the middle hits 205°F, the skin is black and bitter.
The fix: Drop the grill temperature to 375°F to 425°F. Use the indirect heat zone exclusively. If your grill runs hot, calibrate the thermometer or move potatoes to the farthest point from the lit burners.
Soggy, Steamed Skin
This is what happens when you wrap potatoes in foil while they're still wet, or when the grill lid traps excessive moisture. The skin never gets a chance to dry out and crisp.
The fix: Thoroughly dry each potato before oiling. Avoid foil for crispy skin. If you must use foil, wrap loosely and leave a small vent at the top.
Uneven Cooking Across the Grate
Grills have hot spots, especially near the burners or the edges of the cooking surface. Some potatoes finish at 35 minutes while others take over an hour.
The fix: Rotate potatoes every 20 minutes. Swap positions between the inner and outer areas of the cool zone. Use a thermometer on every potato if you're serving multiple people.
How to Rescue a Potato That's Underdone or Overdone
Mistakes happen. Here's how to salvage the situation.
Underdone potatoes. Slice them in half, brush the cut side with a little oil, and place them cut-side down on the cool side of the grill. Close the lid and cook for another 10 to 15 minutes. You'll get a crisped cut surface and a fully cooked interior.
The texture isn't identical to a properly baked potato, but it's still delicious.
Overdone potatoes. If the interior has turned dry and mealy, the best salvage is to mash them. Scoop out the flesh, add butter, milk, and salt, and mash until smooth. You've essentially made instant grilled mashed potatoes, which is a great side dish in its own right.
Burnt skin with raw center. Strip the skin off completely. Scoop the interior into a bowl, add a splash of broth or milk, and heat gently. You lose the crispy skin, but the interior can still be salvaged.
None of these rescues are perfect, but they're better than tossing a perfectly good potato into the bin.
Best Toppings and Serving Ideas for Grill-Baked Potatoes
The potato is the canvas. Here's what works well with the smoky flavor.
Classic loaded. Butter, sour cream, shredded cheddar, chives, and crumbled bacon. This is the standard for a reason.
Southwest style. Black beans, corn, salsa, avocado, and a squeeze of lime. The smoky potato pairs beautifully with these bright flavors.
Broccoli cheddar. Steamed broccoli florets, sharp cheddar, and a drizzle of ranch or blue cheese dressing. Comfort food meets outdoor cooking.
Mediterranean. Hummus, roasted red peppers, feta cheese, and kalamata olives. The saltiness contrasts nicely with the smoky skin.
Breakfast potato. Sautéed peppers, onions, scrambled eggs, and hot sauce. Grilled potatoes make an excellent breakfast base.
One serving tip: season the potato interior with salt immediately after slicing. The hot steam opens up the starches and the salt absorbs deeper into the flesh. This simple step makes a noticeable difference.
Frequently Asked Questions
How long does it take to bake a potato on a gas grill?
Plan for 45 to 60 minutes at 375°F to 425°F using indirect heat. Larger potatoes take longer, and foil-wrapped potatoes cook slightly faster. Always verify doneness with a thermometer reading of 205°F to 210°F.
Should I wrap potatoes in foil before grilling?
It's optional. Foil traps steam, creating softer skin and slightly faster cooking. No foil means crisp, smoky skin.
The choice depends on your texture preference. You can also start unwrapped and wrap halfway through for a hybrid result.
Can I use direct heat instead of indirect heat?
Direct heat will burn the skin before the center cooks through. Baked potatoes require indirect heat to cook evenly. The setup takes less than five minutes and makes the difference between success and failure.
What temperature should the grill be for baked potatoes?
Aim for 375°F to 425°F. This range allows the exterior to crisp without burning while the interior has enough time to reach the proper internal temperature.
How do I know when a grilled potato is done?
Use an instant-read thermometer inserted into the thickest part. The reading should be 205°F to 210°F. You can also squeeze the potato gently; it should yield slightly under pressure.
Final Worth-It Verdict: Is the Gas Grill the Best Way to Bake Potatoes?
The gas grill isn't the fastest method or the most hands-off. The oven wins on convenience, and the microwave wins on speed. But neither delivers the smoky, crispy skin that makes grilled potatoes memorable.
If you're already firing up the grill for burgers, chicken, or steak, tossing on a few potatoes costs almost no extra effort. They cook alongside your main course and come out ready at the same time. That's the real magic here: meal efficiency.
For parties and cookouts, grilled baked potatoes are a conversation starter. People don't expect them. When they take that first bite and catch the smoke, they'll ask how you did it.
One final tip: practice makes perfect. Your first batch might come out uneven. Your second will be better.
By the third, you'll have the timing dialed in for your specific grill, and you won't think twice about it.
That's the whole process. Preheat, set up indirect heat, season, cook, rest, and enjoy. It's simple once you understand the heat zones.
What About Baking Potatoes in Foil Packets?
Foil packets work well if you're cooking on a charcoal grill or a small gas grill with limited space. Wrap each seasoned potato tightly in heavy-duty foil, then place it on the cool side of the grill. Cook for 50 to 60 minutes, flipping once halfway through.
The tradeoff is texture. Foil traps steam, so the skin softens instead of crisping. You also lose most of the smoky flavor, since the foil blocks the grill's atmosphere.
If crispy skin is your goal, skip the foil. If you prioritize convenience and tender skin, foil packets are a solid fallback.
Temperature Troubleshooting: Why Your Grill Runs Hot or Cold
Gas grills are rarely accurate at their built-in thermometer. A 2025 aggregate review of popular grill models found that built-in dials ran off by an average of 25°F to 50°F. That's enough to ruin a batch of potatoes.
Hot grill. If your potatoes are browning too fast on the exterior, drop the burner output to medium-low. You can also move them further from the lit burners. The goal is gentle, even heat.
Cold grill. If the potatoes aren't cooking within 60 minutes, you might be losing heat through a dirty grill or an old propane tank. Clean the grates, check the fuel level, and make sure the lid closes tightly.
Stubborn hotspots. Every grill has them. Map yours over time by watching where the flames licked and where the food charred. Those zones matter when you rotate your potatoes.
Feeding a Crowd: Scaling Up the Recipe
Batch cooking on a gas grill is straightforward. A standard three-burner grill fits six to eight medium russets comfortably, spaced an inch apart. For larger gatherings, use a perforated grill pan to add more potatoes while keeping airflow around each one.
Cook time doesn't change with batch size, but rotation does. Swap the inner potatoes with the outer ones every 20 minutes to equalize heat exposure. For large parties, pre-cook potatoes in the microwave for 5 minutes, then finish on the grill for 25 to 30 minutes.
The smoke flavor develops while the total time drops dramatically.
| Batch Size | Grill Capacity | Cook Time | Rotation Notes |
|---|---|---|---|
| 4 potatoes | 2-burner grill | 45–55 minutes | Rotate once at 20 minutes |
| 6 potatoes | 3-burner grill | 50–60 minutes | Swap positions at 20 and 40 minutes |
| 8 potatoes | 3-burner + grill pan | 50–60 minutes | Swap outer and inner positions every 20 minutes |
| 12 potatoes | Par-cooked first | 25–30 minutes | Rotate once halfway through |
How to Clean Your Grill After Baking Potatoes
Potatoes leave behind oil residue and salt that can bake onto grates. Let the grill run on high for 10 minutes after removing the potatoes. That burns off the stuck-on residue.
Then brush the grates with a stiff grill brush.
For stubborn spots, cut an onion in half, spear it with a fork, and rub the cut side across the hot grates. The natural acidity breaks down baked-on oil. Finish by wiping the grates with a paper towel dipped in vegetable oil to prevent rust between uses.
When to Par-Cook Potatoes Before Grilling
Microwave par-cooking is a legitimate time-saver. Pierce the potatoes as usual, then microwave for 4 to 5 minutes per potato. Transfer them to the grill and cook for 25 to 30 minutes at 375°F to 425°F.
The interior starts at a higher temperature, so the grill only needs to crisp the skin and add smoke.
This method trades a little texture for a lot of speed. The interior isn't as perfectly fluffy as a full grill bake, but it's close. For weeknight dinners where time is tight, it's the difference between homemade and takeout.
If you need the classic crispy exterior and the full smoky depth, stick with the traditional 45 to 60 minute method. The par-cook shortcut is best reserved for busy evenings or feeding a crowd fast.

Similar Posts



















